This section covers how to deploy a containerized traditional WebSphere Application Server application to run on Red Hat OpenShift Container Platform using OpenShift Pipelines.
The diagram below shows the flow of the pipeline which starts when the developer checks their code in to Git and ends with the application being deployed in a build namespace. The diagram below shows the following flow:
1) A developer commits code to the
application repository2) A webhook starts a
tekton pipelinerunning in thebuildproject3) A
tekton taskclones the application source code (4) from the application repository, usesMavento compile and test the application before usingbuildahto create aimagewhich is pushed to the image registry (5)6) A
tekton taskdeploys theapplicationto the local namespace using the image from theimage registry(7)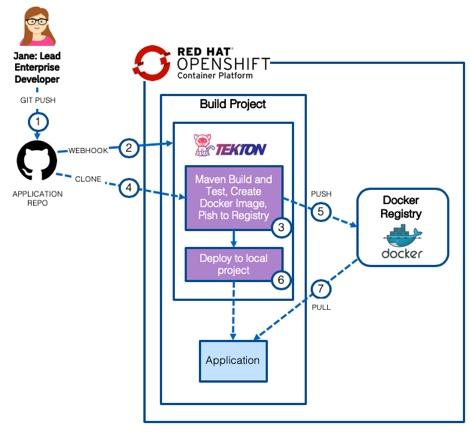
Deploy the Application
The following steps will deploy the modernized Customer Order Services application in a Traditional WAS container to a Red Hat OpenShift cluster.
Prerequisites
You will need the following:
- Git CLI
- Red Hat OpenShift Container Platfrom 4.3 with Cluster Admin permissions
- oc CLI
- DB2 Database
- Red Hat OpenShift Pipelines
- Tekton CLI
Getting the project repository
You can clone the repository from its main GitHub repository page and checkout the appropriate branch for this version of the application.
git clone https://github.com/ibm-cloud-architecture/appmod-twas-tekton.gitcd appmod-twas-tekton
Create application database infrastructure
As said in the prerequisites section above, the Customer Order Services application uses uses DB2 as its database. Follow these steps to create the appropriate database, tables and data the application needs to:
Copy the createOrderDB.sql and initialDataSet.sql files you can find in the Common directory of this repository over to the db2 host machine (or git clone the repository) in order to execute them later.
ssh into the db2 host
Change to the db2 instance user: `su {database_instance_name}“
Start db2:
db2startCreate the ORDERDB database:
db2 create database ORDERDBConnect to the ORDERDB database:
db2 connect to ORDERDBExecute the createOrderDB.sql script you copied over in step 1 in order to create the appropriate tables, relationships, primary keys, etc:
db2 -tf createOrderDB.sqlExecute the initialDataSet.sql script you copied over in step 1 to populate the ORDERDB database with the needed initial data set:
db2 -tf initialDataSet.sql
If you want to re-run the scripts, please make sure you drop the databases and create them again.
Create the build project
Create the project that will be used for the Tekton pipeline and the initial deployment of the application.
Issue the command shown below to create the project:
oc new-project cos-twas-tekton
Import the Tekton resources
Import the Tekton Tasks, Pipeline and PipelineResources in to the project using the commands shown below:
cd tekton/tekton-onlyoc apply -f gse-apply-manifests-pvc-task.yamloc apply -f gse-buildah-pvc-task.yamloc apply -f gse-build-deploy-pvc-pipeline.yamloc apply -f gse-build-pipeline-resources.yaml
Run the pipeline
The recommended way to trigger the pipeline would be via a webhook (link) but for simplicity the command line can be used. Issue the command below to trigger the pipeline:
tkn pipeline start gse-build-deploy-pvc-pipeline -n cos-twas-tekton
When prompted, accept the default git-source value as shown below:

When prompted, accept the default docker-image value as shown below:

View the pipeline logs
In the OpenShift Container Platform UI, change to the Developer view, select the
cos-twas-tektonproject and then select Pipelines. Click on the Last Run
Select Logs
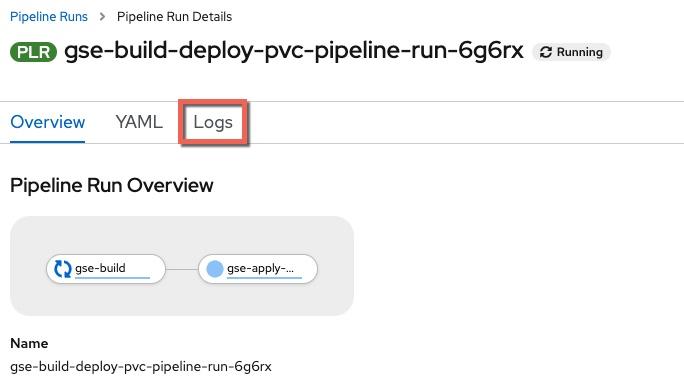
The pipeline will execute and the logs will be displayed
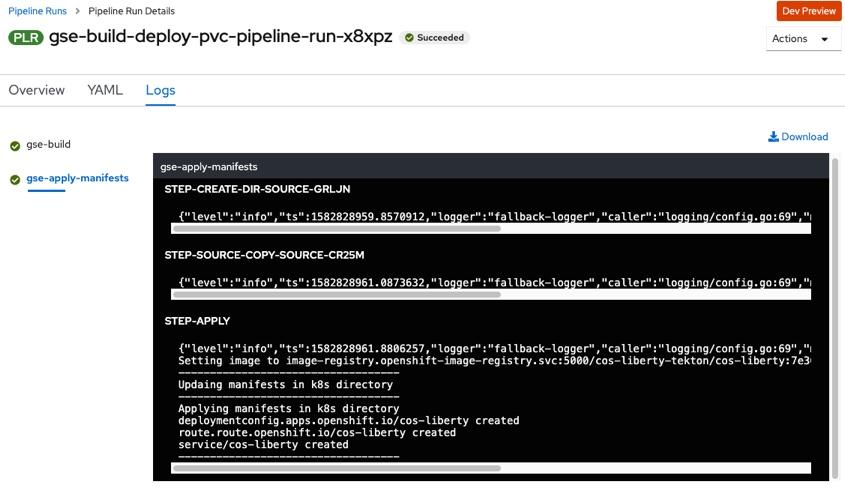
Once both the
gse-buildandgse-apply-manifestssteps are complete, the pipeline is finished.
Validate the application
Now that the pipeline is complete, validate the Customer Order Services application is deployed and running in cos-twas-tekton project
- In the OpenShift Console, navigate to Topology view and click on the
cos-twasDeployment to view deployment details, includingPodsServicesandRoutes
Topology
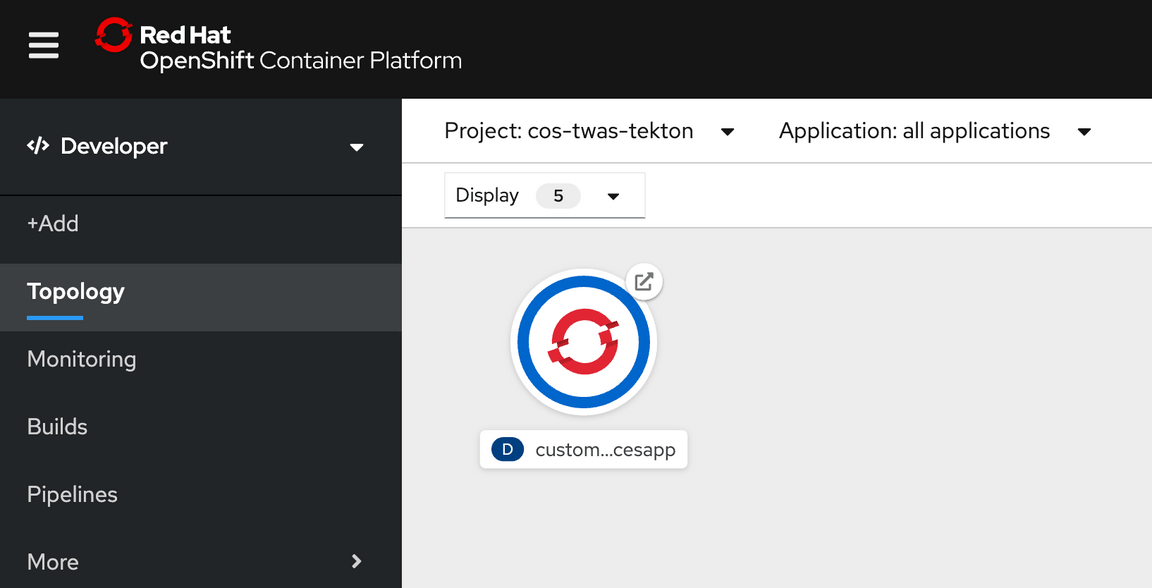
From this view you can also view the route for the application. Note that the URL is < application_name >-< project_name >.< ocp cluster url >. In this case the project name is
cos-liberty-tekton
Add
/CustomerOrderServicesWebto the end of the URL in the browser to access the application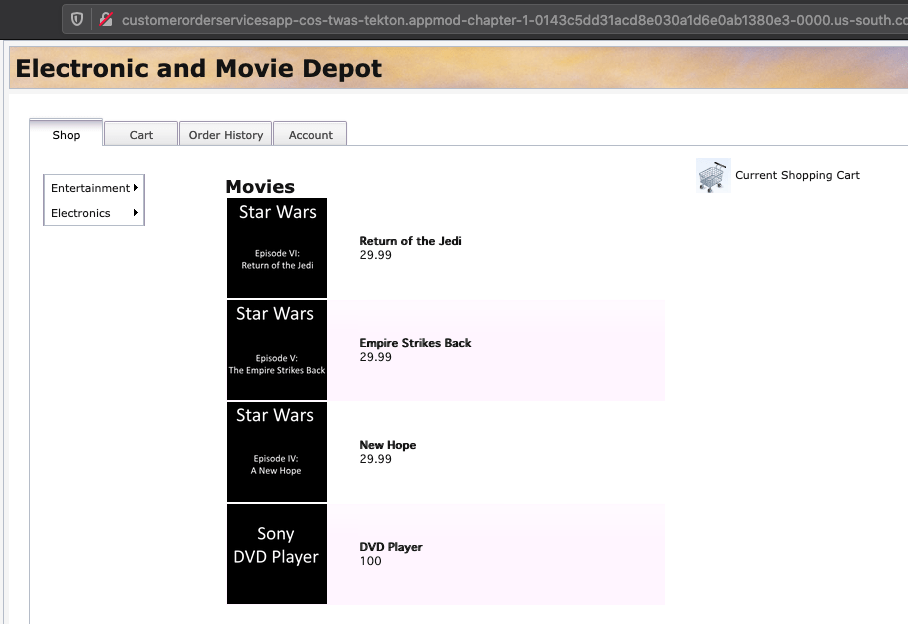
Log in to the application with
username: rbarciaandpassword: bl0wfish
Review and Next Steps
In this section you configured a CI/CD pipeline for the CustomerOrderServices application that builds a single immutable image for the latest version of the application and then deploys it to a dev environment.