Watson Studio - developing the predictive model
Cloud Pak for data integrates Watson Studio to develop machine learning models and do feature engineering. In this chapter we use AutoAI to develop the model. In the following chapter Developing the Anomaly Detection Model with Python and Custom Notebook in Watson Studio we create the model using a notebook.
The Data Steward has prepared a dataset by joining different datasources, but he did not pay attention to the column semantic for building a machine learning. So the Data Scientist will start to review and adapt the data.
Data analysis and refinery
The data scientist wants to do at least two things on the current data set: remove unnecessary features (the longitude and lattitude will not have any value to assess the sensor anomaly), and transform the problem to be a classification problem by adding a label column.
Note that we could have model the problem using unsupervised learning and identify anomaly with clustering or anomaly detection. This will be done in the future to present a more realistic approach to this classical industrial problem.
For that, we use the Data Refinery capability of Cloud Pak for Data:

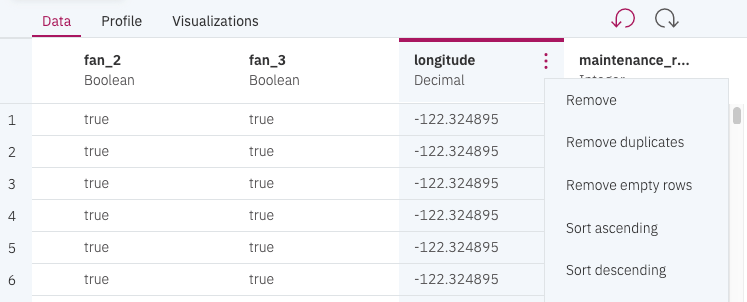
and then clean and shape the data to prepare for the model. For example remove columns like latitude, longitude, timestamp, _id, telemetry_id:
To define a new column to be used as label, we use the Operation tab to add Conditional replace to apply some basic logic on the sensor columns by using one thresholds: test the value of the CO2 to be greater than or equal to threshold (22):
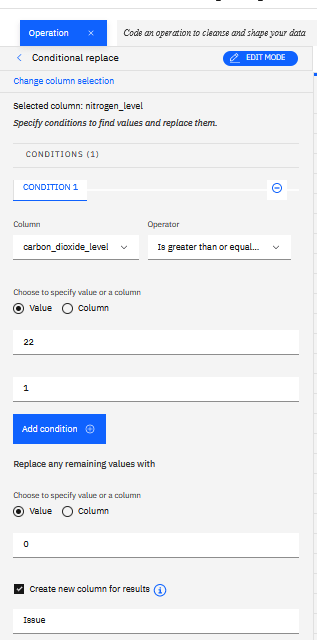
We add the new label (Issue =1, NoIssue=0) in the Issue Flag column:
Which translates to something like: “Replaced values for Issue: carbon_dioxide_level where value is greater than or equal to 22 as 1. Replaced all remaining values with 0.”
Once the label column is added, and any new derived data are added, we can start a refinery job, that will create a new dataset in our project:

AutoAI
AutoAI uses data to automatically select the best supervised algorithm to determine the best classification or regression models with optimized hyper parameters.
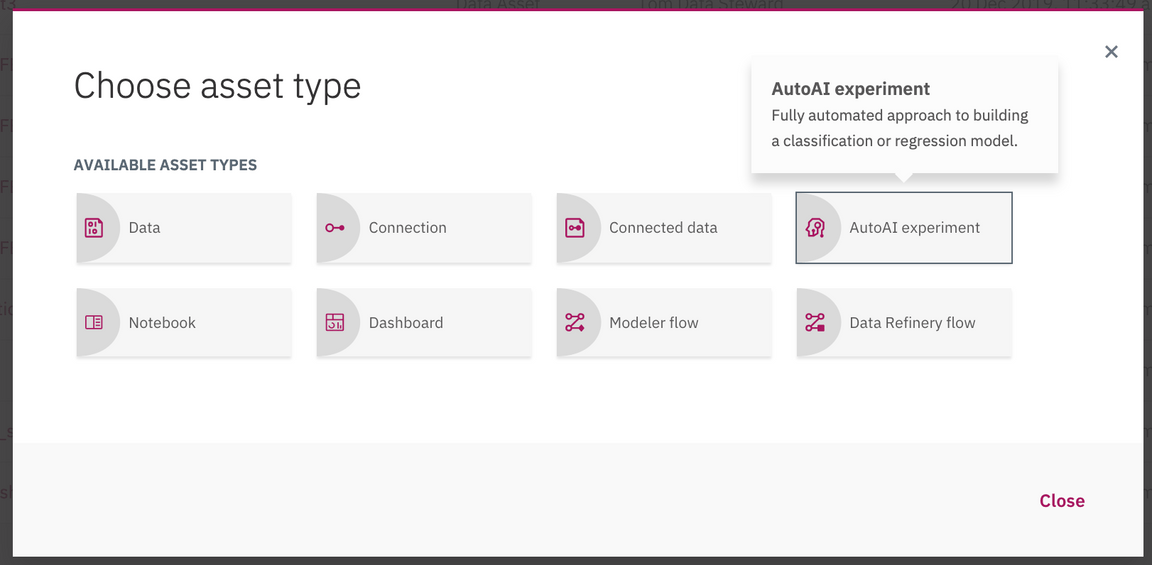
Within a project, we can add an Auto AI Experiment:
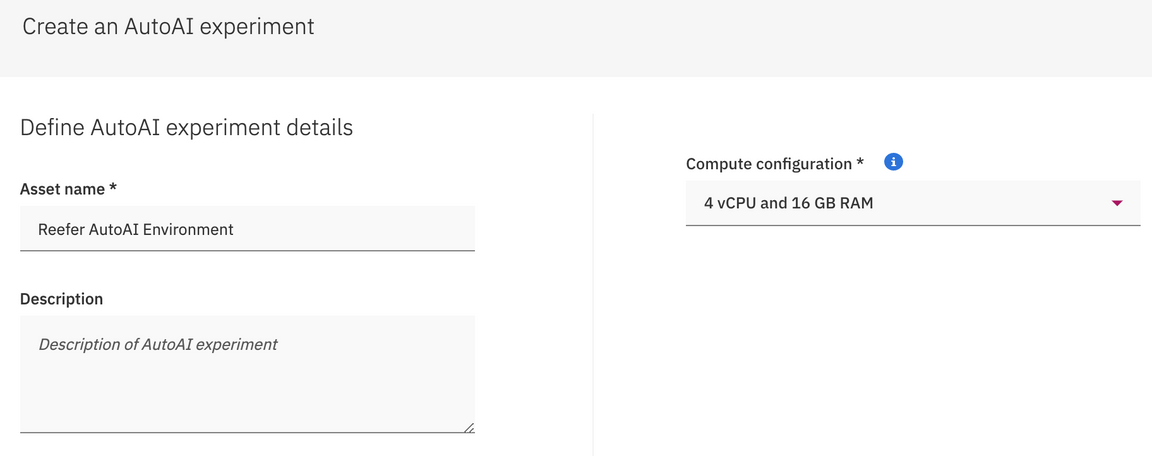
Then specify a name and server configuration:
Add a existing data source (the one prepared by the refinery job), and then specify the column to use for prediction (Issue Flag column):
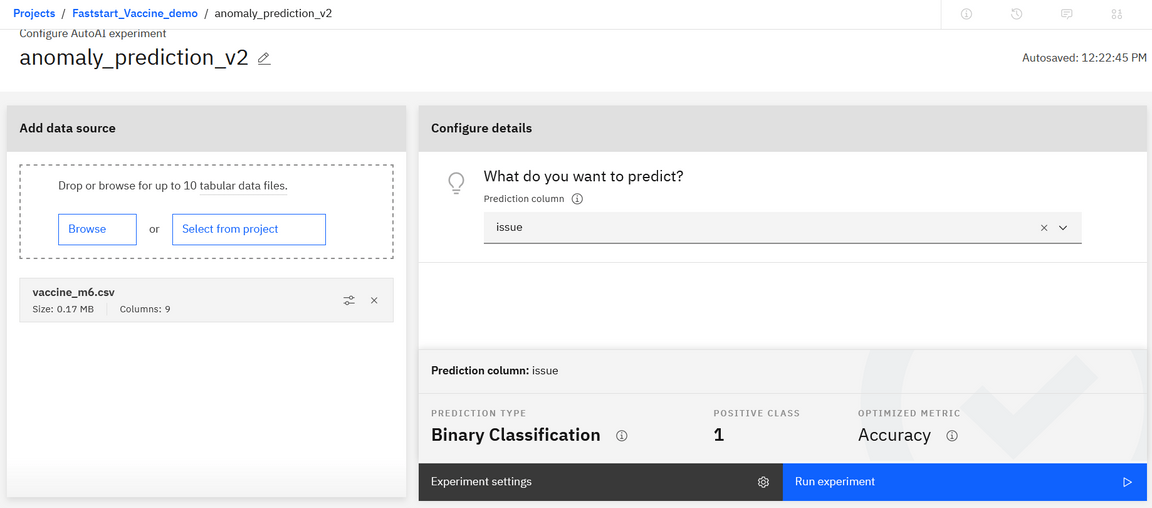
Then execute the prediction experiment.
AutoAI will do different steps, split the data, prepare data, and then select model or algorithm that may better address the problem. For classification model, it will select among 30 potential candidates: decision tree, random forest, LGBM, XGBoost… Each algorithm selection will generate a pipeline which will be scored to present the most accurate one:

Each model pipeline is scored for a variety of metrics and then ranked. The default ranking metric for binary classification models is the area under the ROC curve, for multi-class classification models is accuracy, and for for regression models is the root mean-squared error (RMSE). The highest-ranked pipelines are displayed in a leaderboard, so you can view more information about them. The leaderboard also provides the option to save select model pipelines after reviewing them.
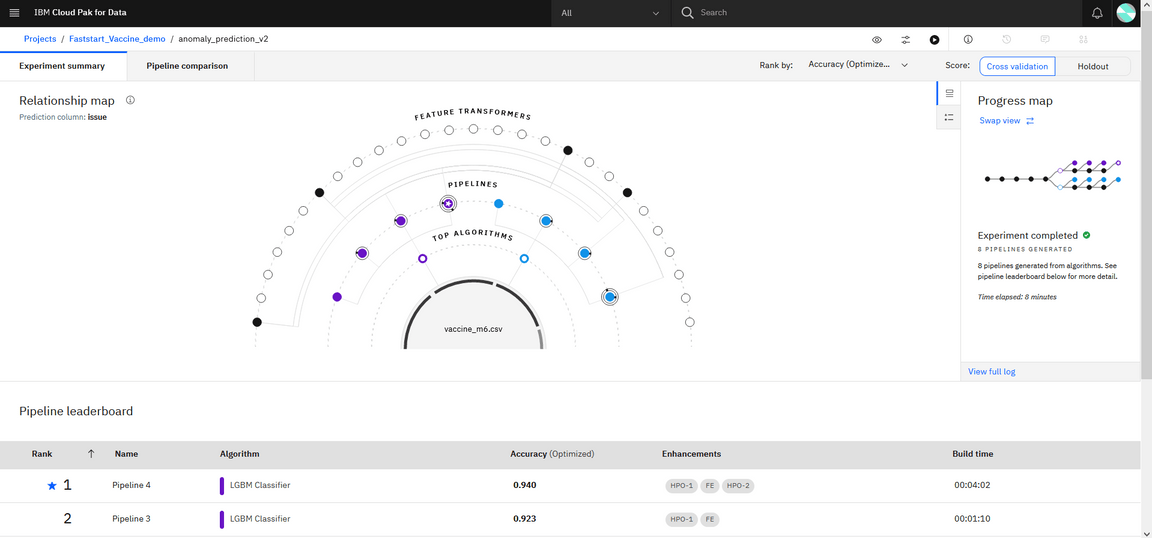
The resulting experiments are ranked.

When models or pipelines are created, we can see the details of each model, to see how they performed.
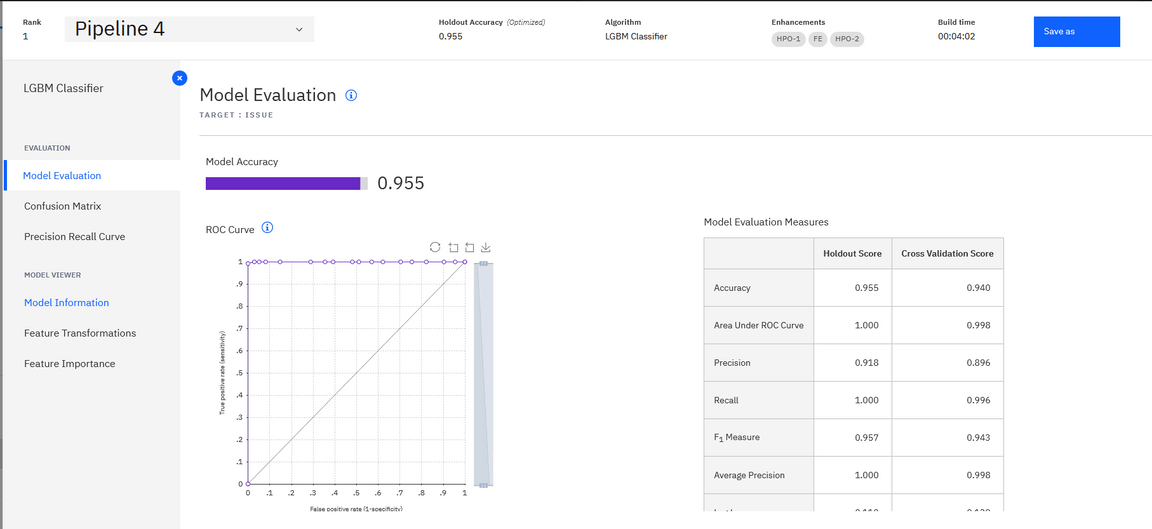
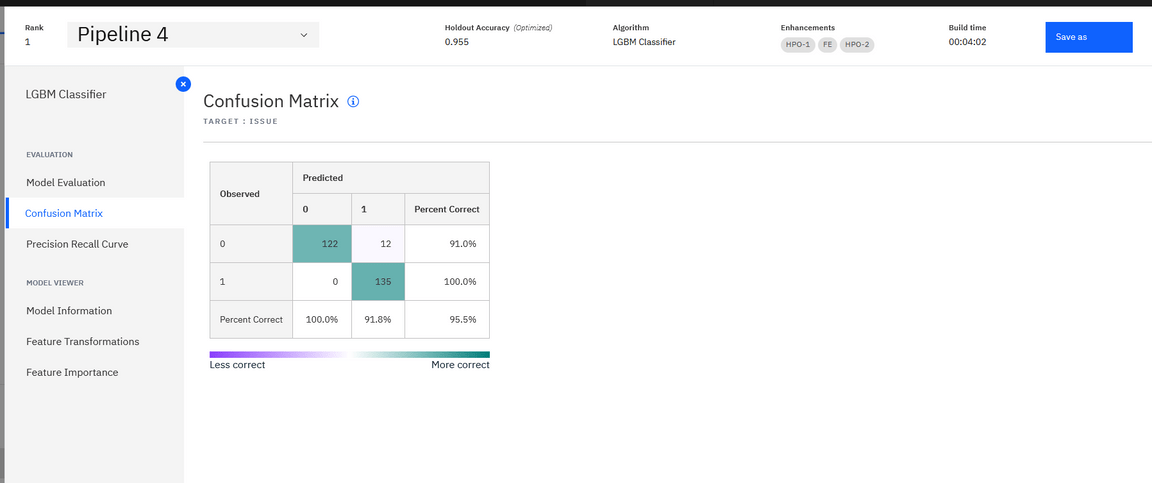
The confusion matrix for the experiment ranked #1:
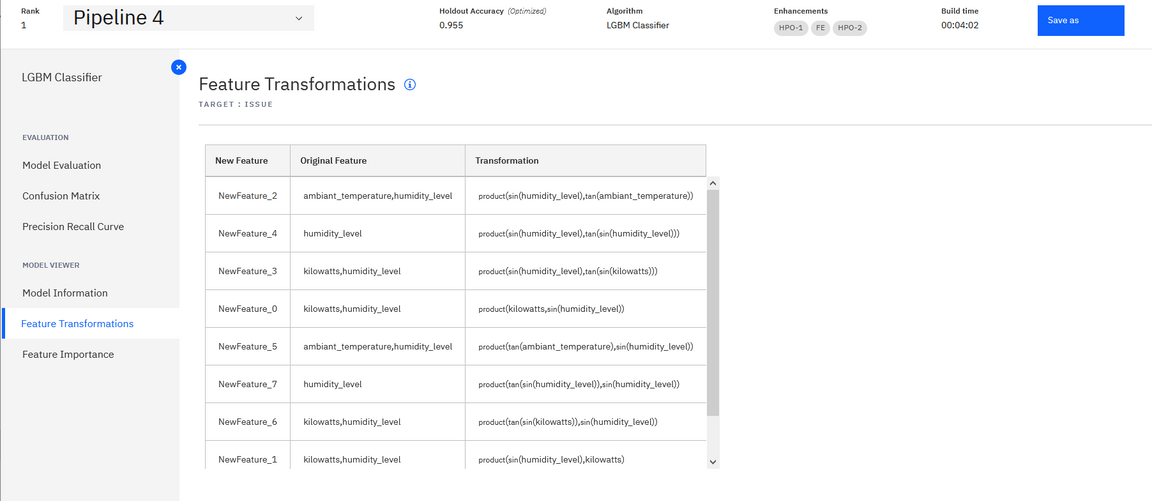
The tool offers nice capabilities like the feature transformation:
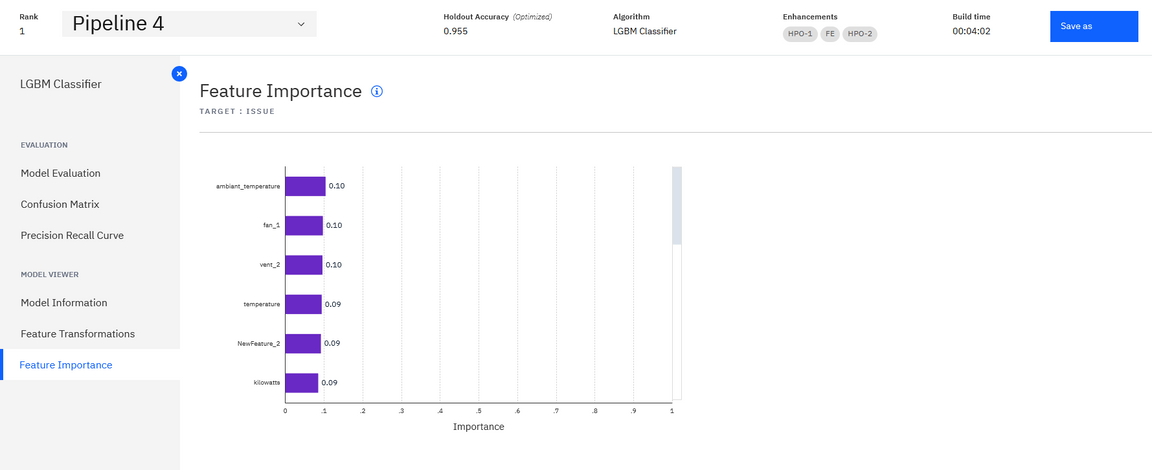
And the feature importance ranking, which helps to assess what are the features that impact the classification.
Once the model is saved, it can be added to a Catalog, and then being deployed.

Model Deployment
Once a model is created is promoted to a “space”.
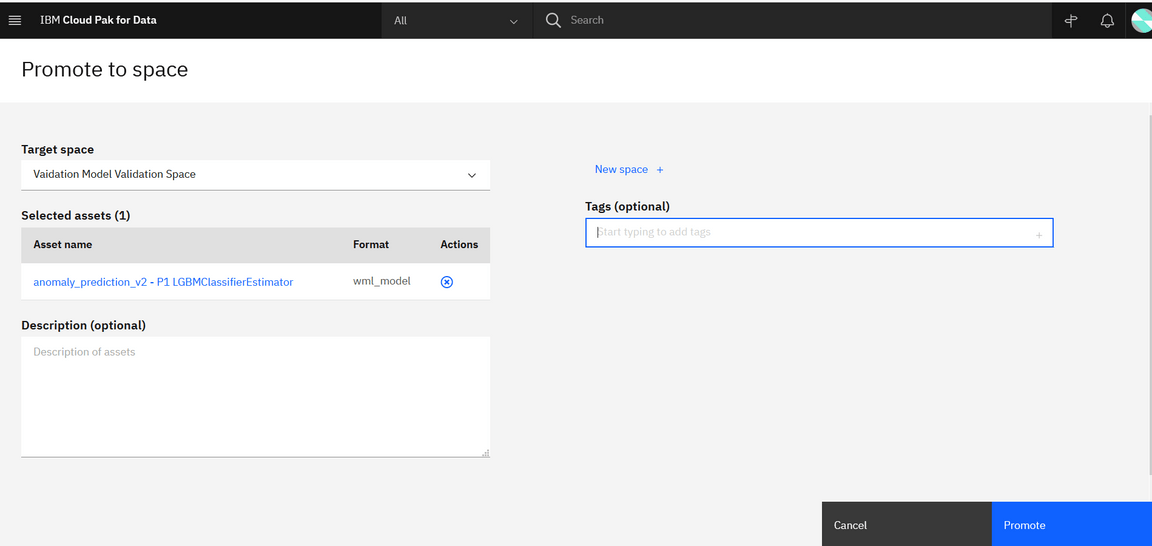
A space contains an overview of deployment status, the deployable assets, associated input and output data, and the associated environments.
To access the deployment space, use the main left menu under Deployments.
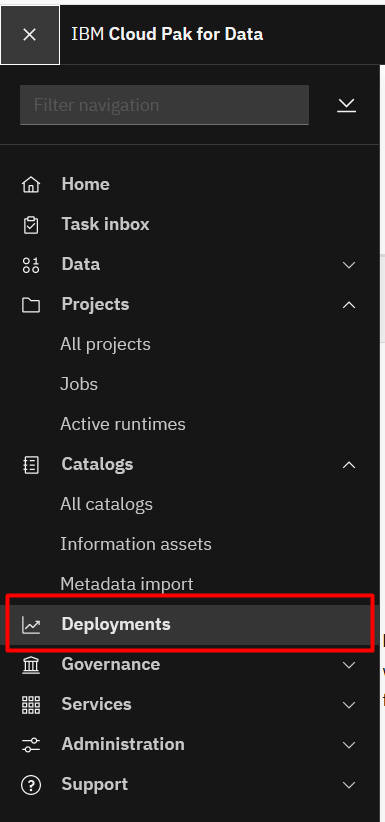
And under Deployments we can see the deployment spaces and activity related to those spaces:

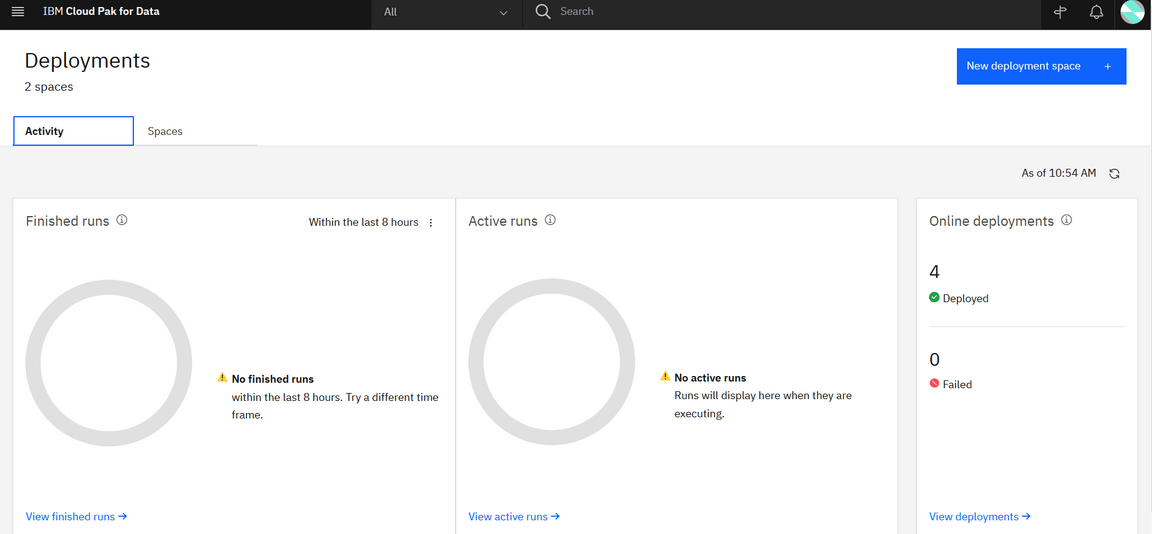
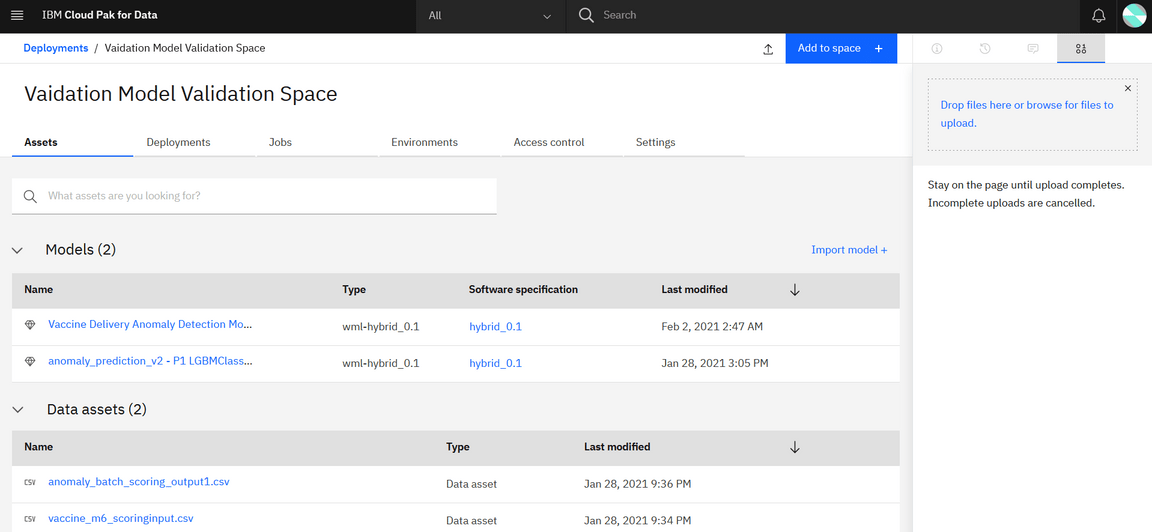
On the Assets page, you can view the assets in the deployment space (Here we have our AutoAI experimental model deployed). You can see how many deployments each asset has and whether the asset is configured for performance batch scoring or monitoring. The following figure displays the deployed model
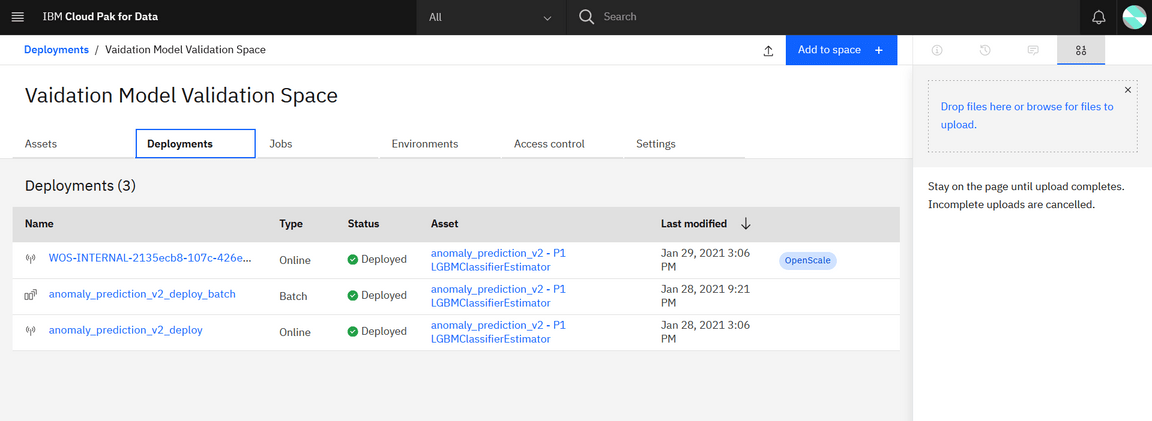

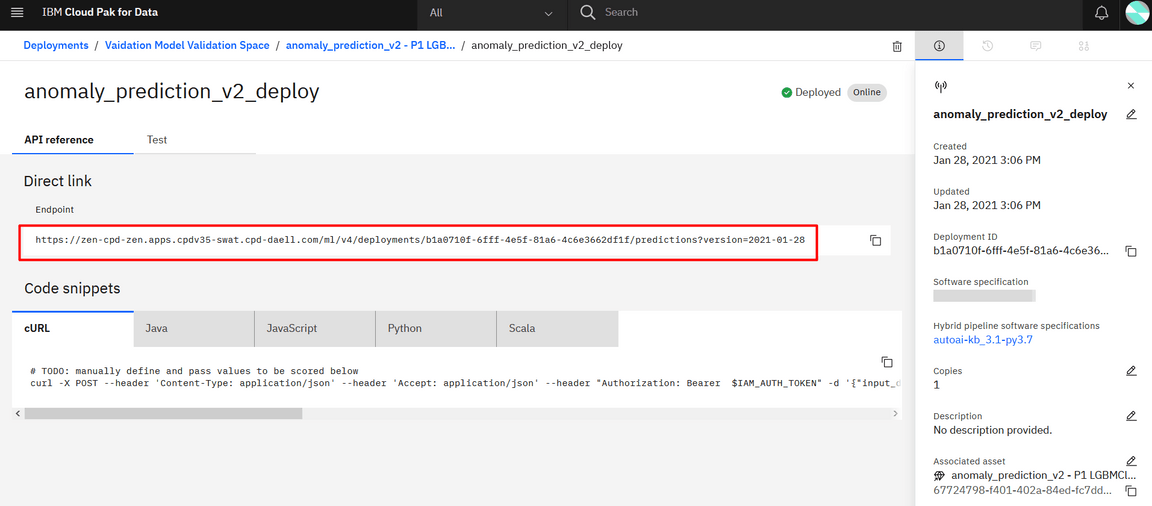
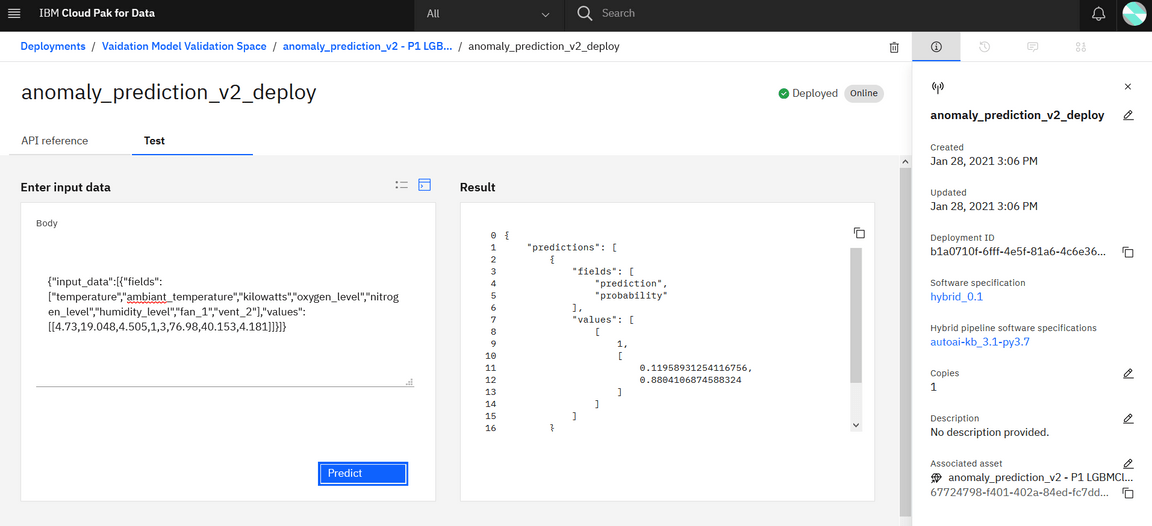
And going into the deployed model view, we can see the API end point:
And even test the prediction from the user interface.
A next step is to infuse this model into the scoring application…
Configuring Model in OpenScale
This step involves configuring model in UAT for performance validation.
In this step, we shall configure various Monitors for the model, namely Fairness, Drift, Accuracy. Also using Watson OpenScale one can explain each prediction by indicating the relative importance of the features in arriving at the prediction.
Note: UAT and Pre-prod can be used interchangeably.
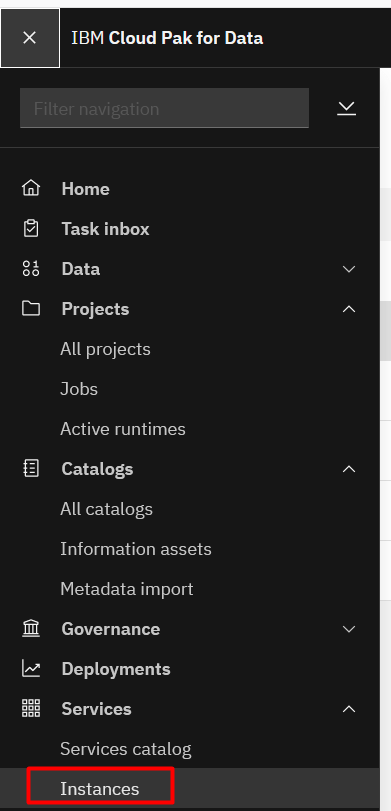
Go to Instances
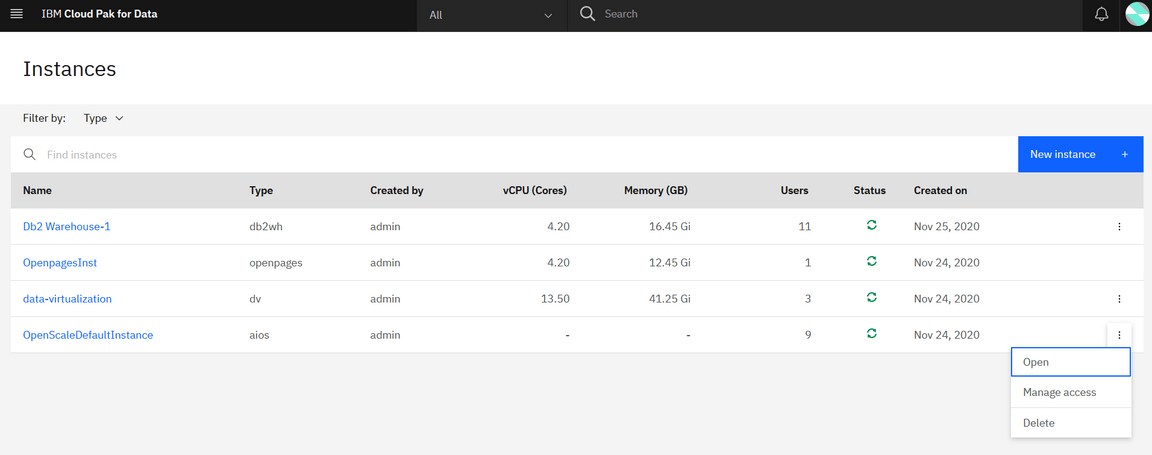
open the openscale dashboard
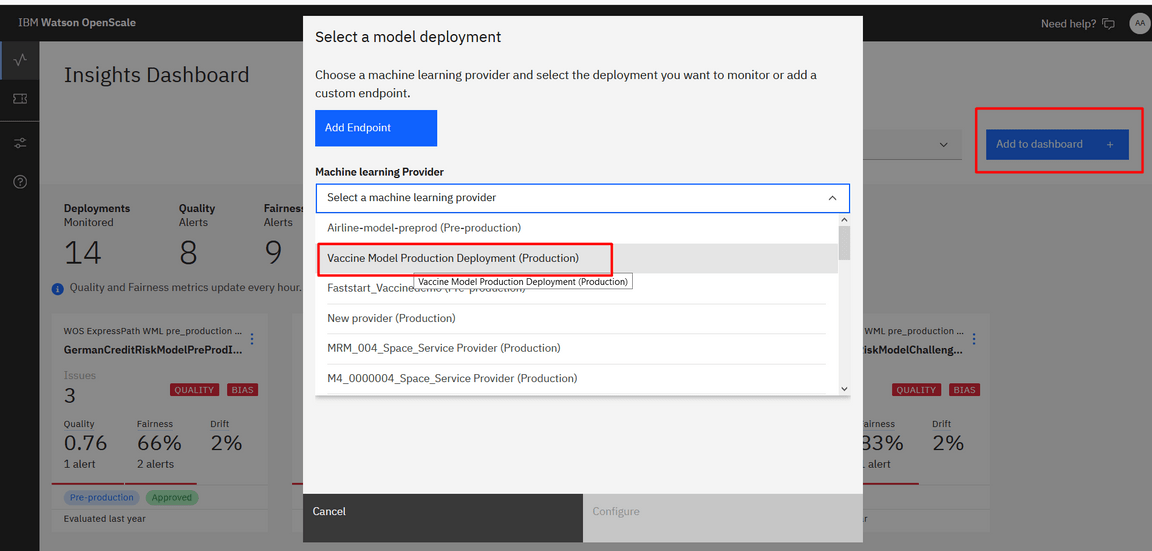
Go to the OpenScale Dashboard, there you would see Add to Dashboard/ Add button that can be used to add a specific deployment for monitoring purpose. This will bring up a popup window showing list of available deployments. This list must show the deployment(s) you have created in previous steps.
Selet the appropriate deployment and press Configure and it will bring you to the next screen that would show you a dialog box to Configure Monitors. Click on the Configure Monitor and that would take you to the screen below.
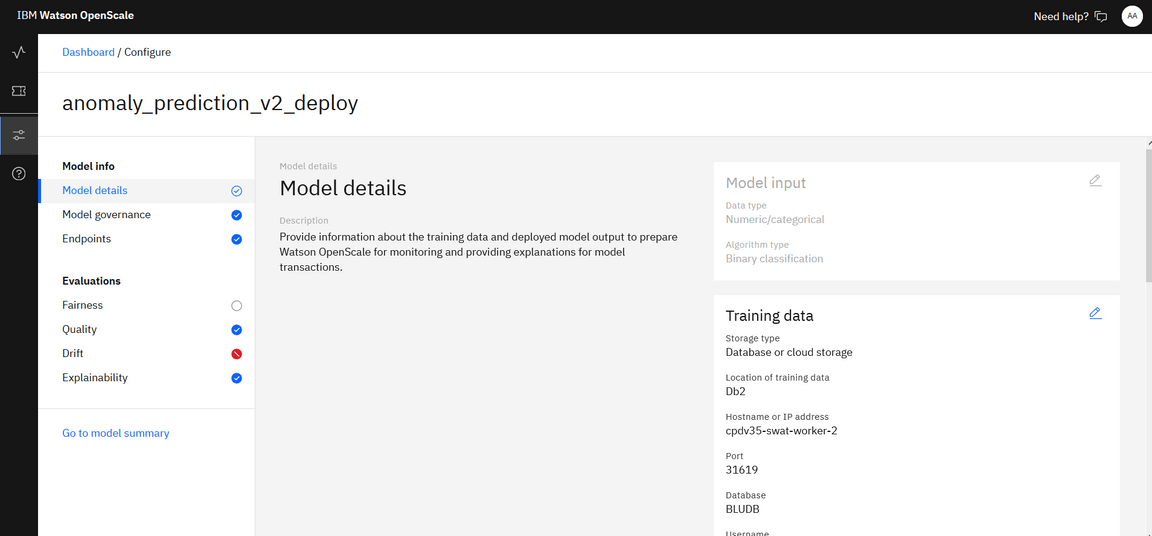
Configure the Model info and Evalualtion details. Now it’s ready for Model monitoring in UAT and you also can evaluate model performance from Openscale.
Pre-Prod Model Evaluation & Approval
This sub-step involves evaluating the models deployed in pre-prod/UAT environment using Openscale and comparing different models to decide the optimal model to be moved to production in later steps.
Pre-prod Model Evaluation
After you are done with configuring the model parameters, you have to evaluate the Model (by going through that Actions drop down) by passing the Feedback data.
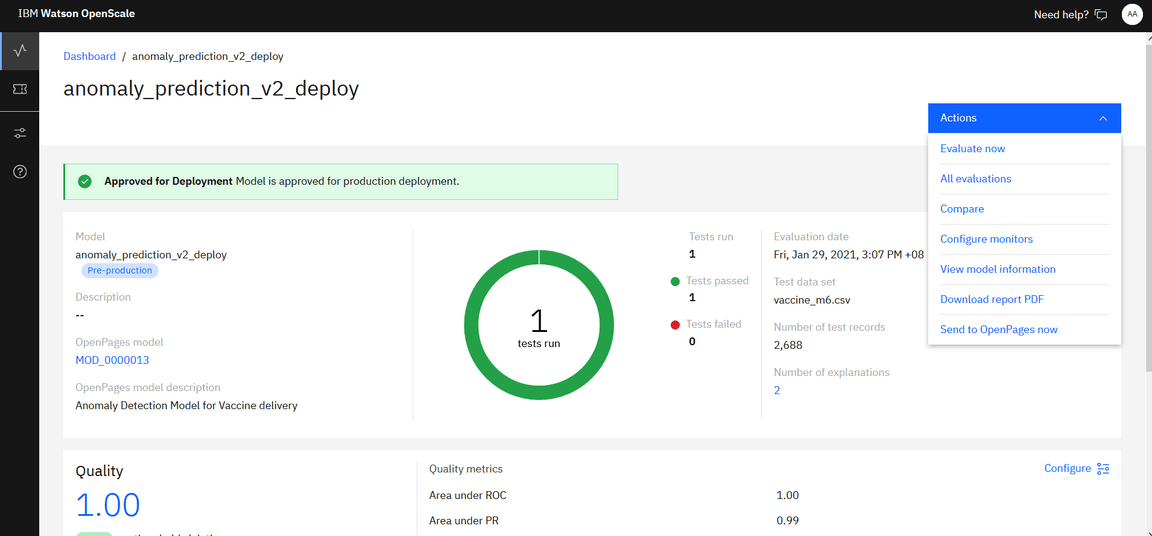
Click on Evaluate Now, select Import from CSV file and browse for the customer_churn_quality_feedback file on your system. This is made available in the data assets which you can download into your system.
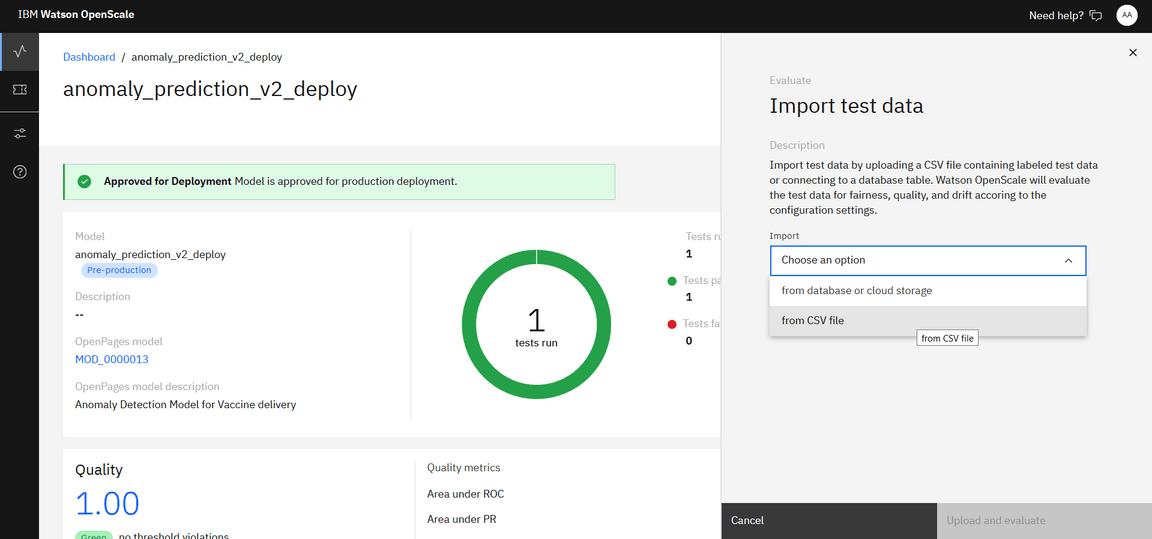
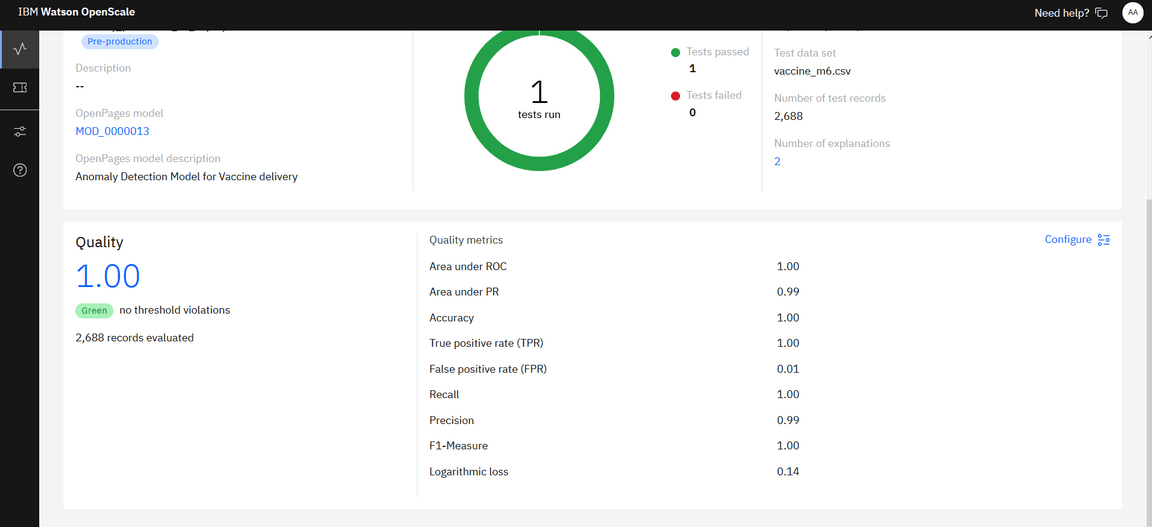
Once you have uploaded the feedback file and clicked on Upload and Evaluate, it may take some time to generate the performance statistics (Fairness/Quality/Drift)
Model Approval
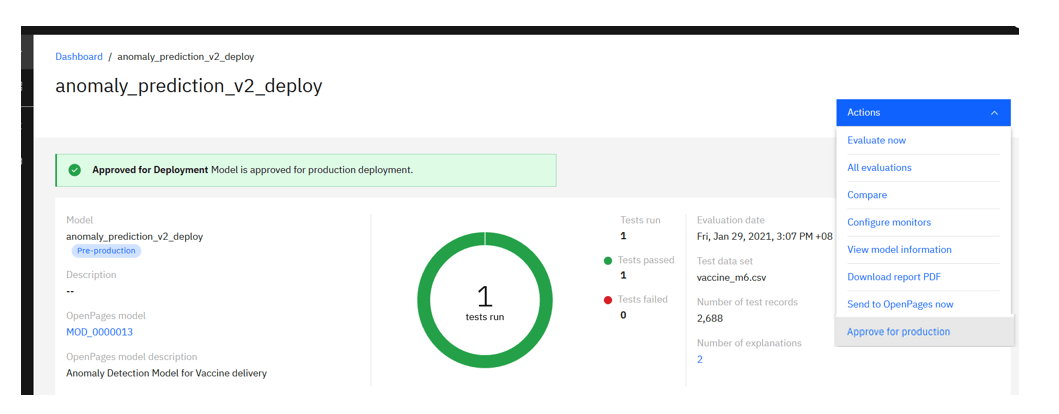
Once you’re satisfied with the deployed model and its performance, approve the model for production (again going through the link in the Actions drop down menu).
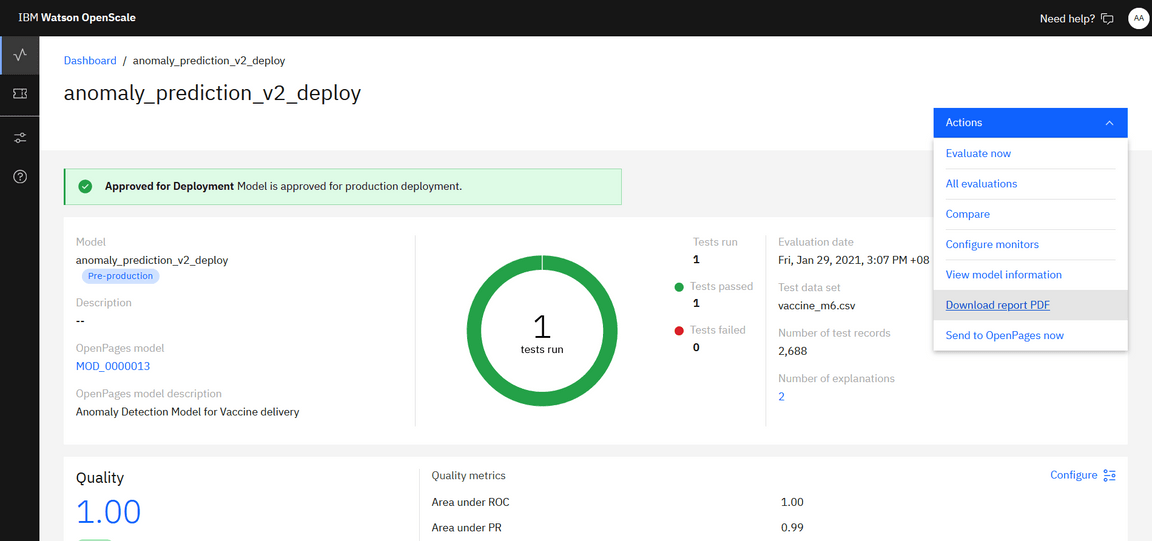
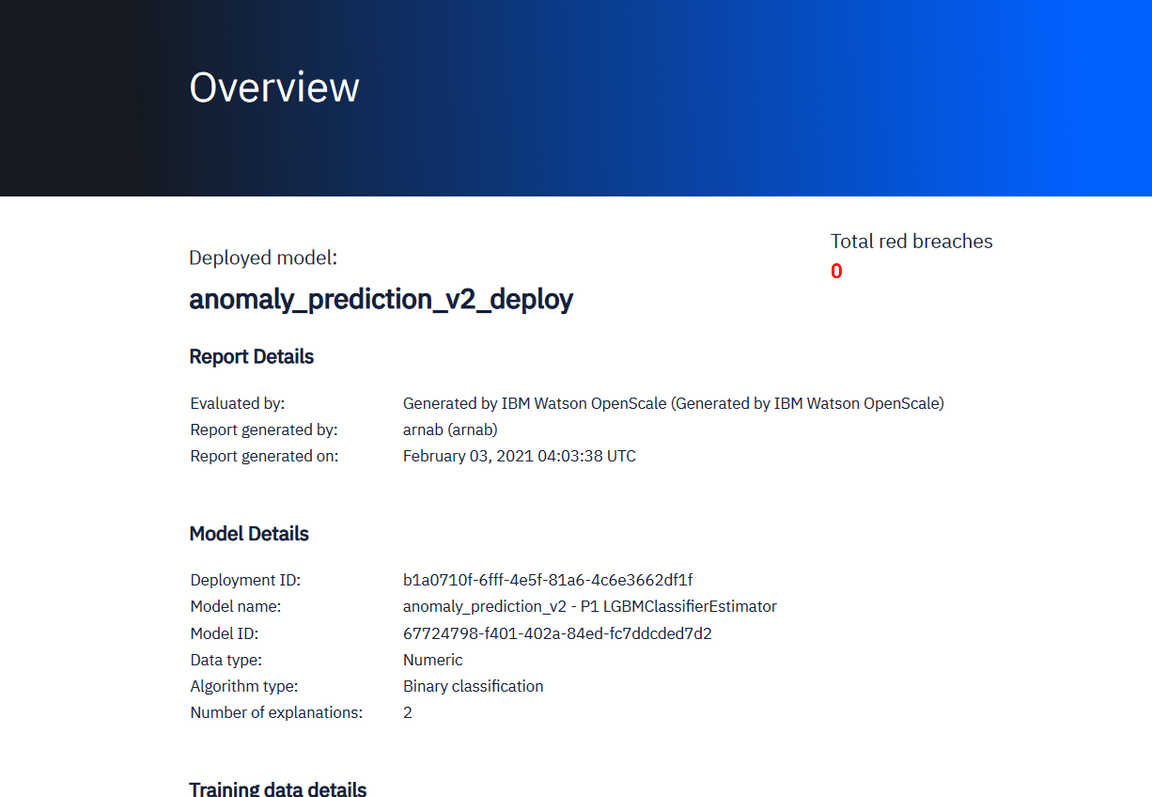
You may also download the Report PDF showcasing the statistics of the chosen model and its associated summary in concise format in the pdf.
Model Deployment and Configuration for Monitoring in Production Environment
Once a model is validated in UAT, deploy the model in a production environment by following the steps below.
This step involves exporting the desired model which was deployed in UAT environment and was later approved to move from from UAT environment to production.
Export UAT Deployment space
Select Vaidation Model Validation Space in Deployments (Menu->Deployments-> Spaces).
Create an export by clicking Export Space icon shown in the image below.

Click on New Export File. Select the Models/asset you intend to Export. Give an appropriate file name and click on Create.
Once the export file has been created, download the zip file on your system.
Create Production Deployment Space
Create a prod deployment space by importing the file you saved in the previous step.
Go to Deployments on left pane in Cloud Pak (shown previously). Click on New deployment space and select Create a space from a file.
Now upload the file into this deployment space and click on Create with an appropriate name for the deployment space.
After that is done, you can go to the newly created deployment space and see the models you created in previous step and was moved to production after inspection.
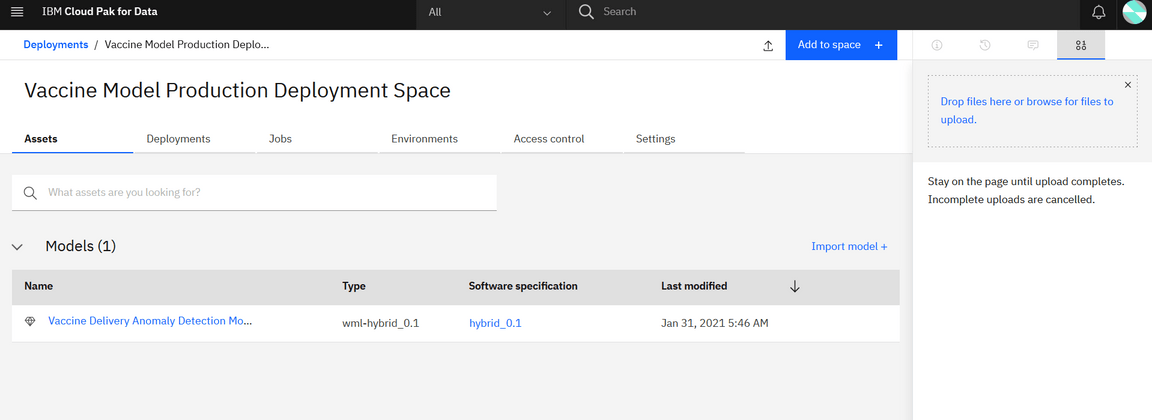
Now add admin as a collaborator using the access control tab. This is required for OpenScale model monitoring.
Prod Model Deployment
The Model will appear in the Assets tab (that you had approved last time in UAT Deployment Space). Deploy the Model (select online deployment type) and give the deployment a unique name appending to Prod_Deployment.
The Deployed model will appear in the Deployments tab under the same deployment Space.
Configuring Prod Model in OpenScale
Go to OpenScale and add a Machine learning provider
Select Watson Machine Learning (V2) as the Service provider type Select the production space you just created in the dropdown of Select space
Select Environment type as Production.
Add Model for Monitoring
Now go back to the OpenScale dashboard. Click on Add to Dashboard or Add. It will show a list of deployments in a popup window. Select your prod deployment and press Configure. Click on Configure and Press Configure monitors in the next dialog box. Click on Import settings
Please wait for sometime. It imports the settings of the model you had configured for UAT/ pro-prod environment.
When the import is done, all the parameters (Fairness/Quality/Model parameters etc.) and configuration/settings would automatically be imported.