App ID Lab
In this lab, we will be covering how to use IBM App ID service to customize your application running on Kubernetes.
Accessing AppID Service
- Login to your IBM Cloud account and navigate to your account’s Services.
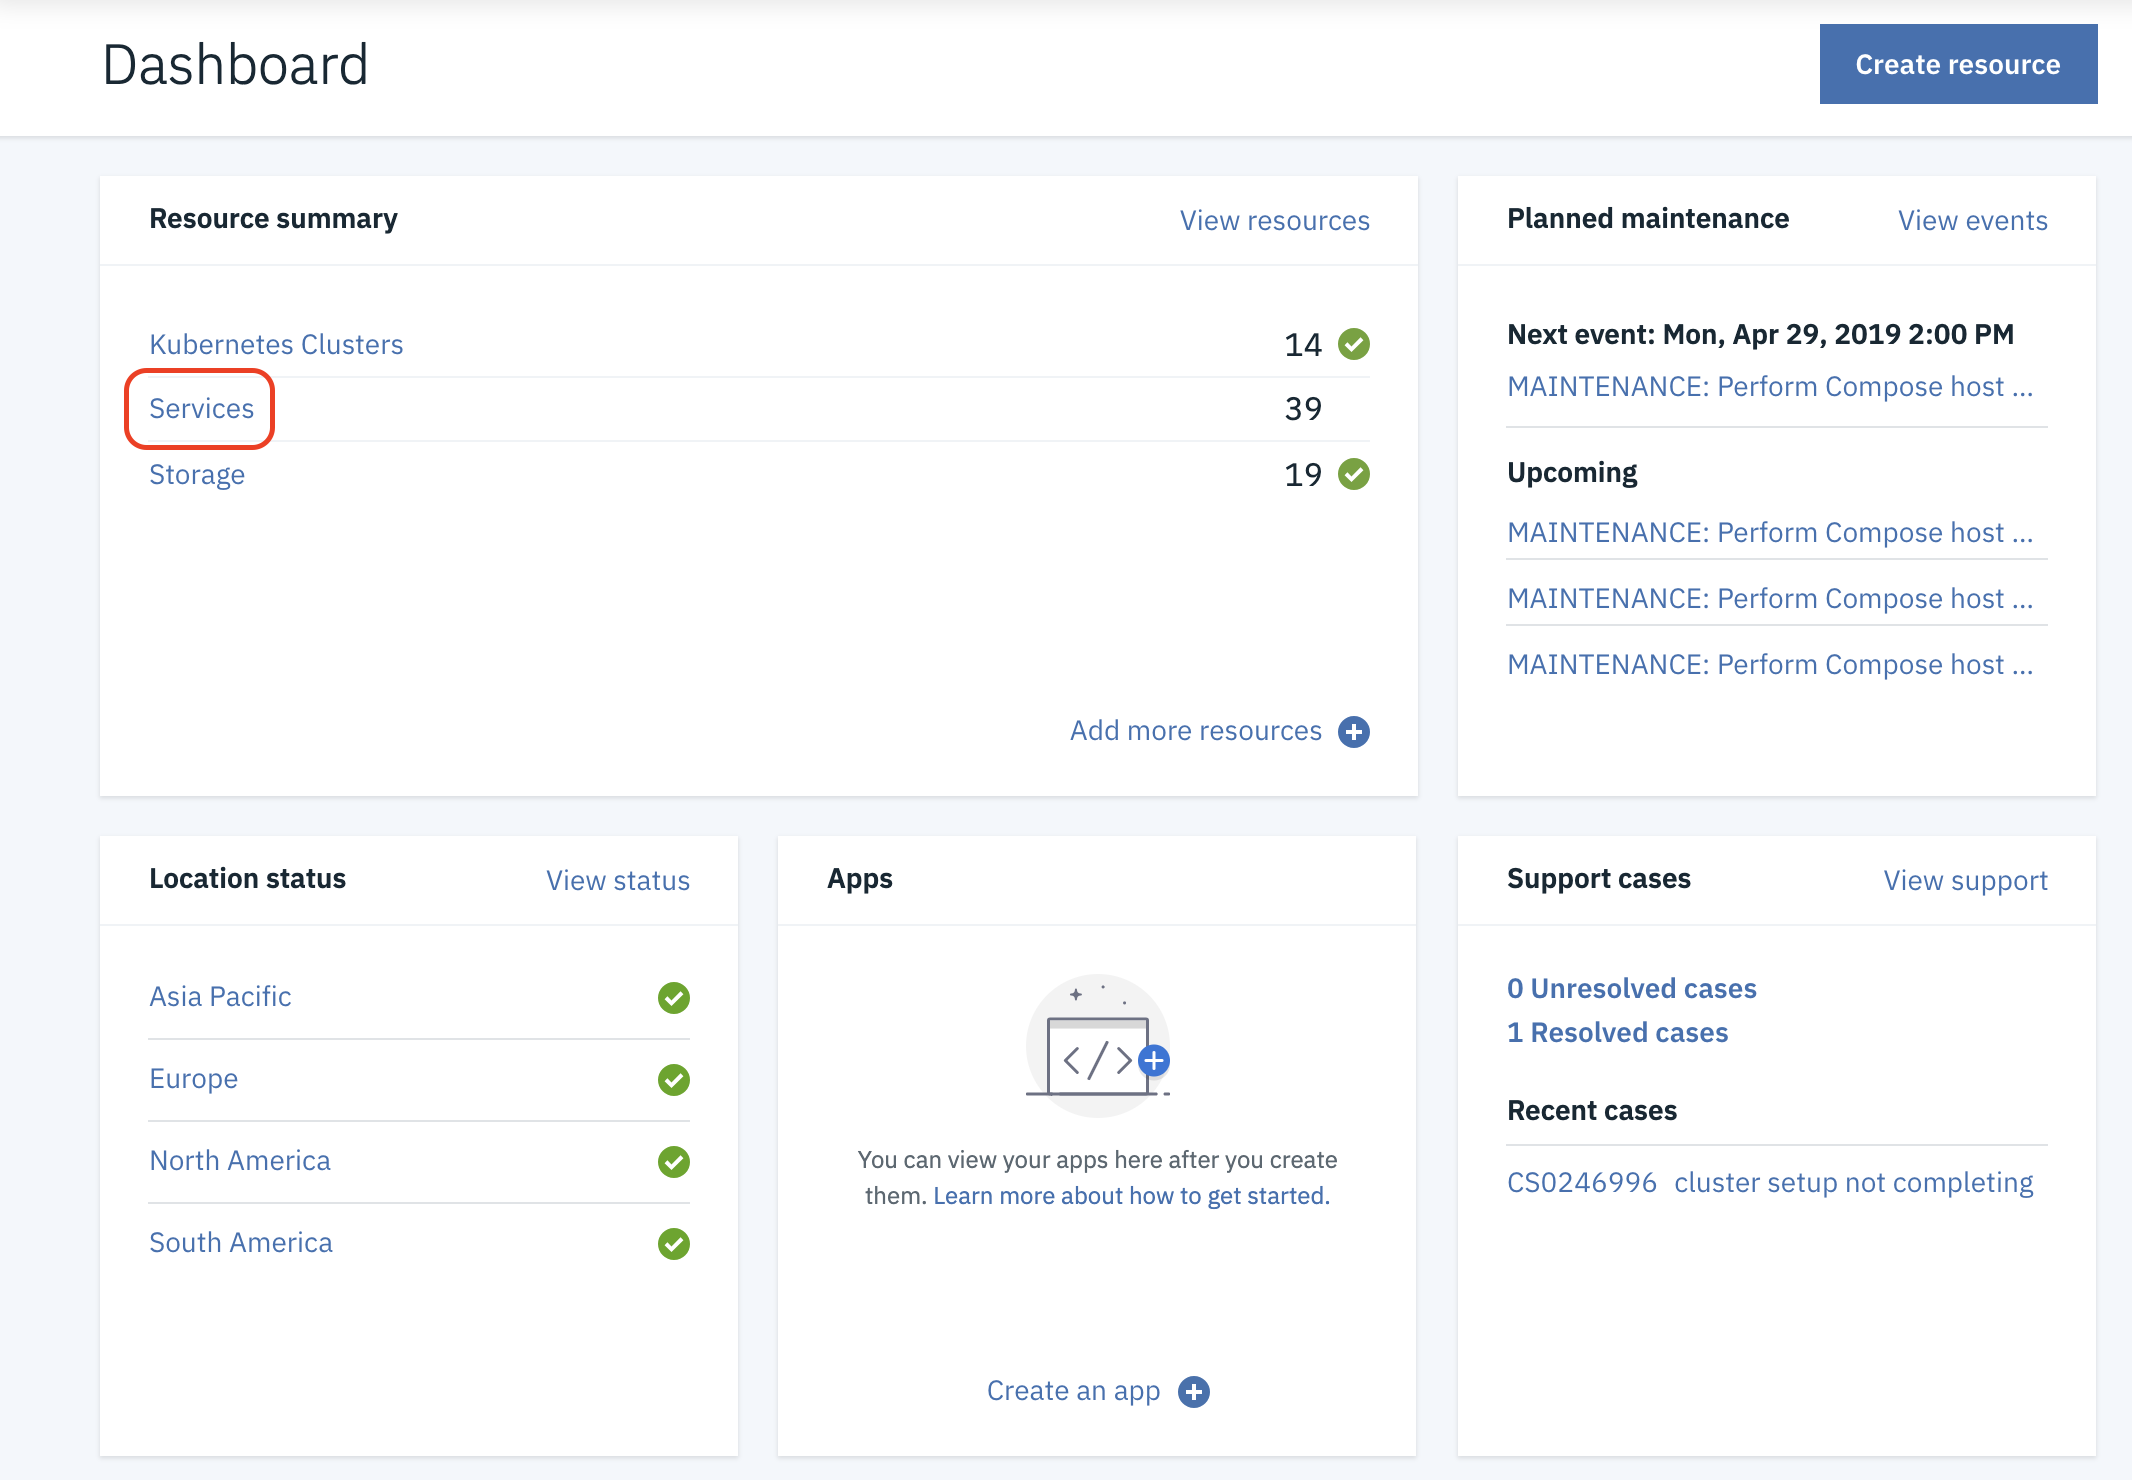
- Next find your AppID instance. It will have the following name convention TeamXXXRG-appid
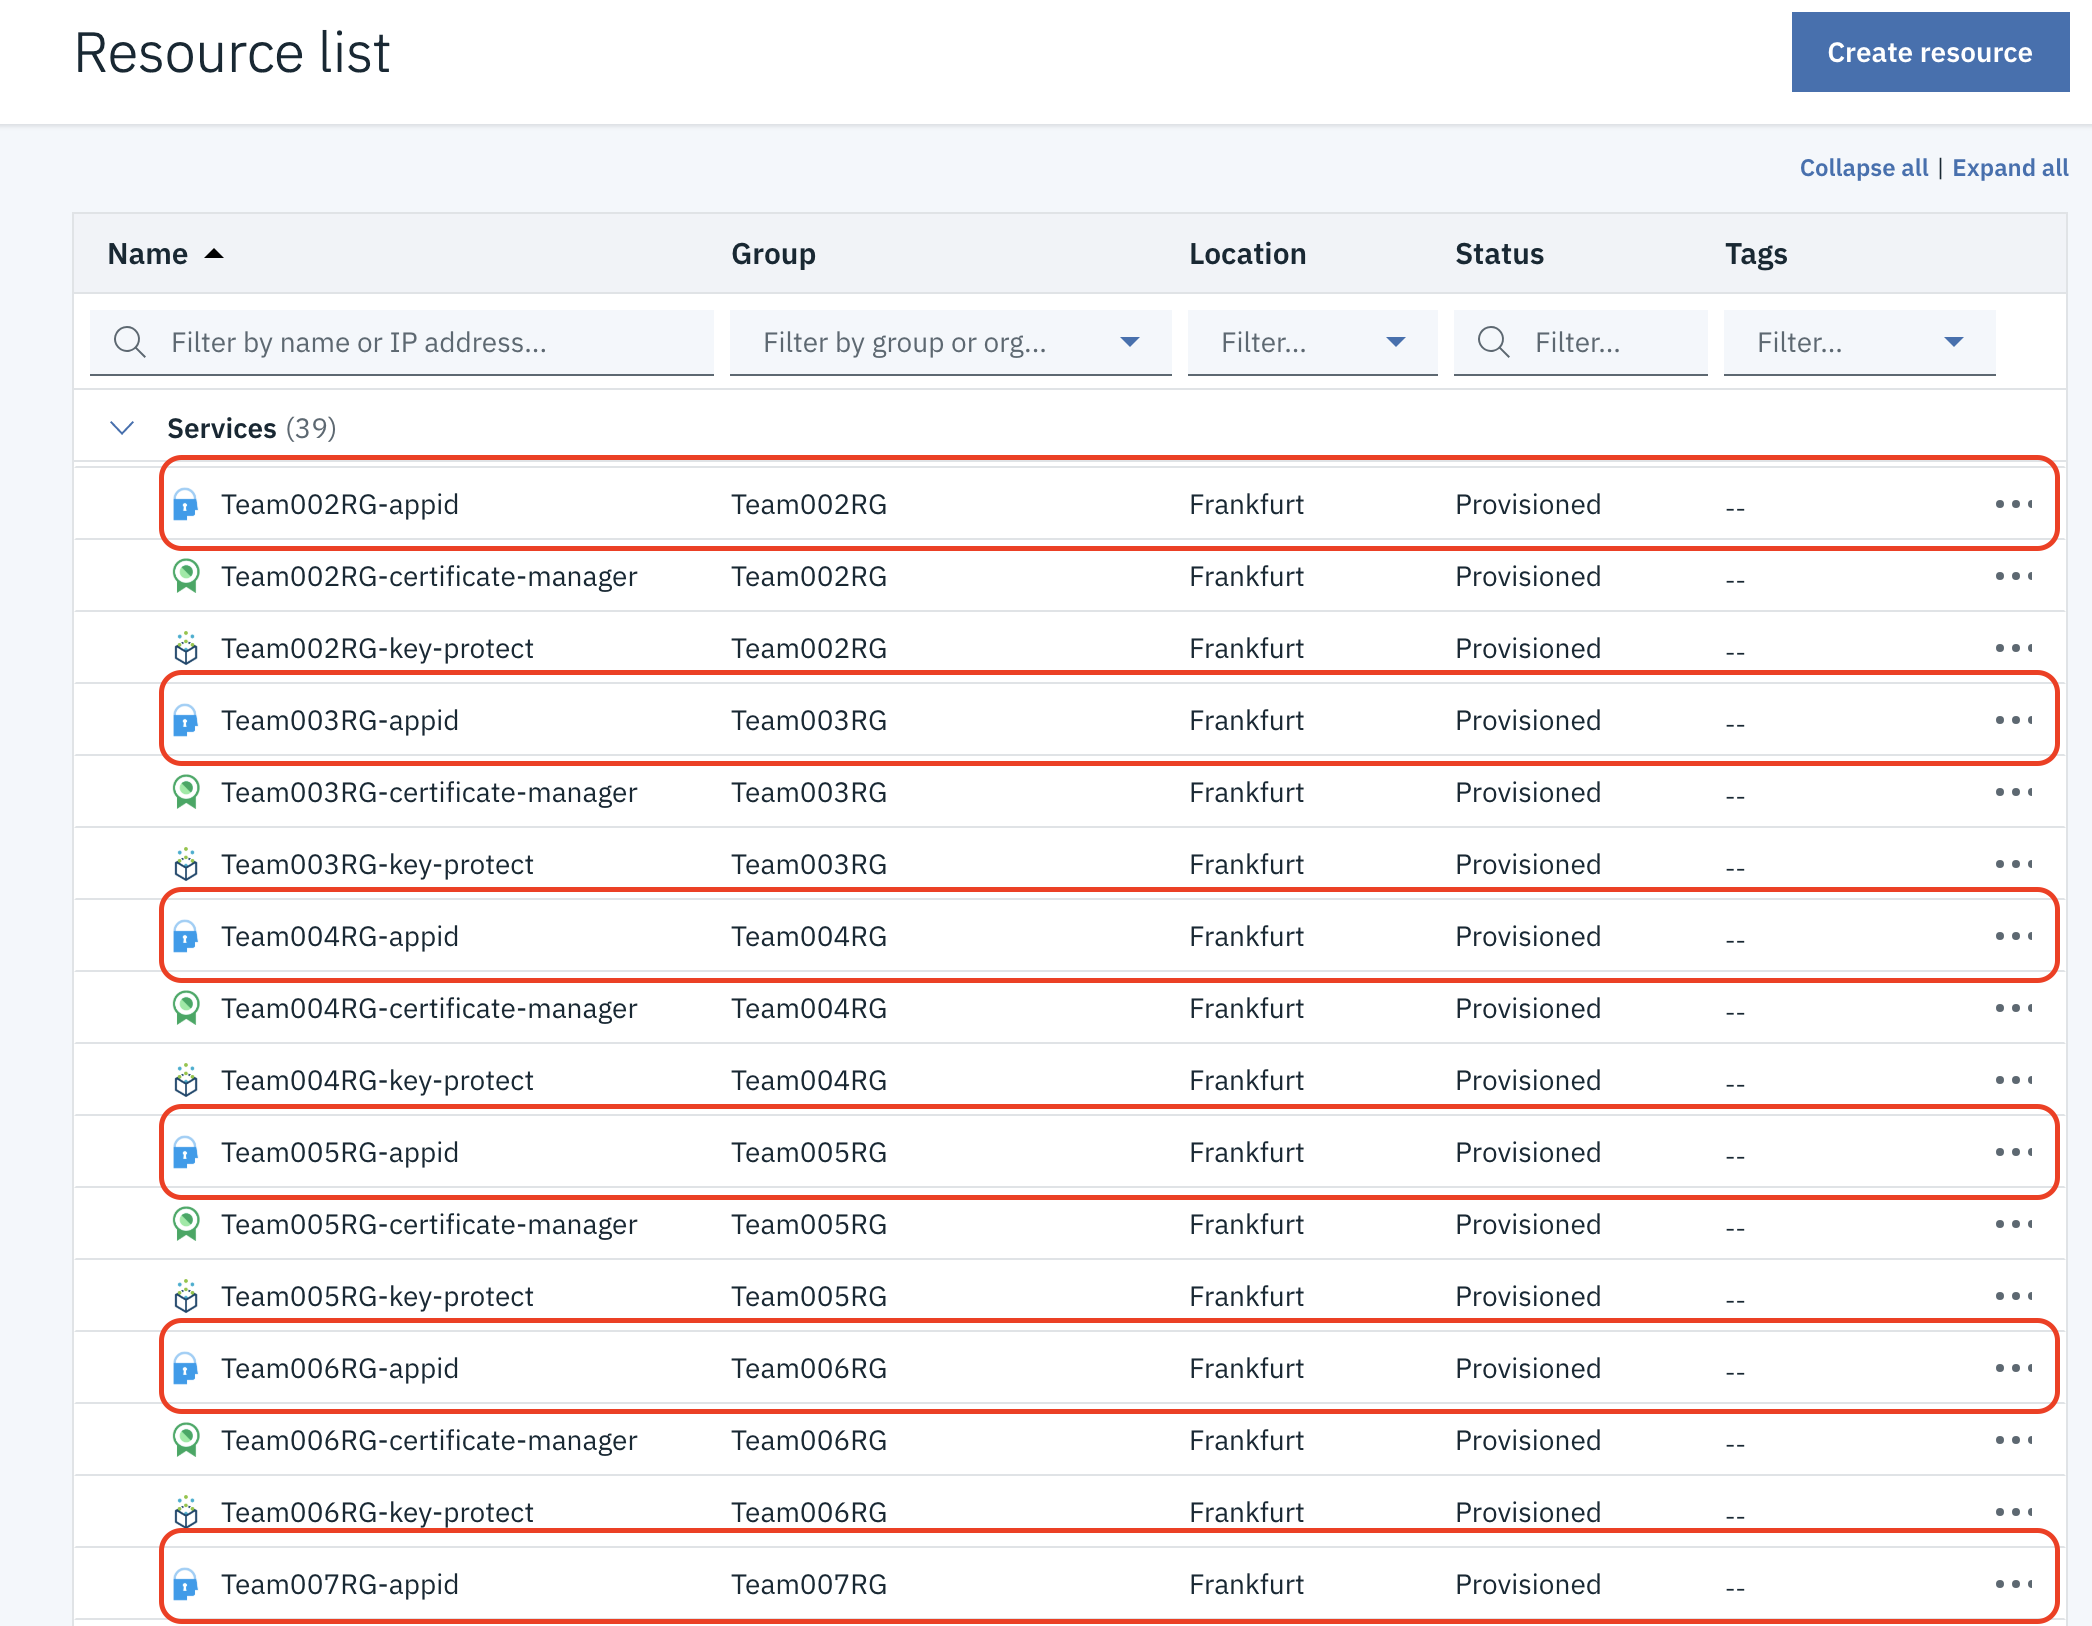
- Click on your team’s service and you will open the AppID Overview Dashboard.
Cloud Directory Configuration
In the Cloud Directory Configuration tab we are going to customize the Welcome Email your users will recieve when they sign up for your website.
Welcome Templates
- Go to Cloud Directory -> Workflow Templates -> Welcome Email.
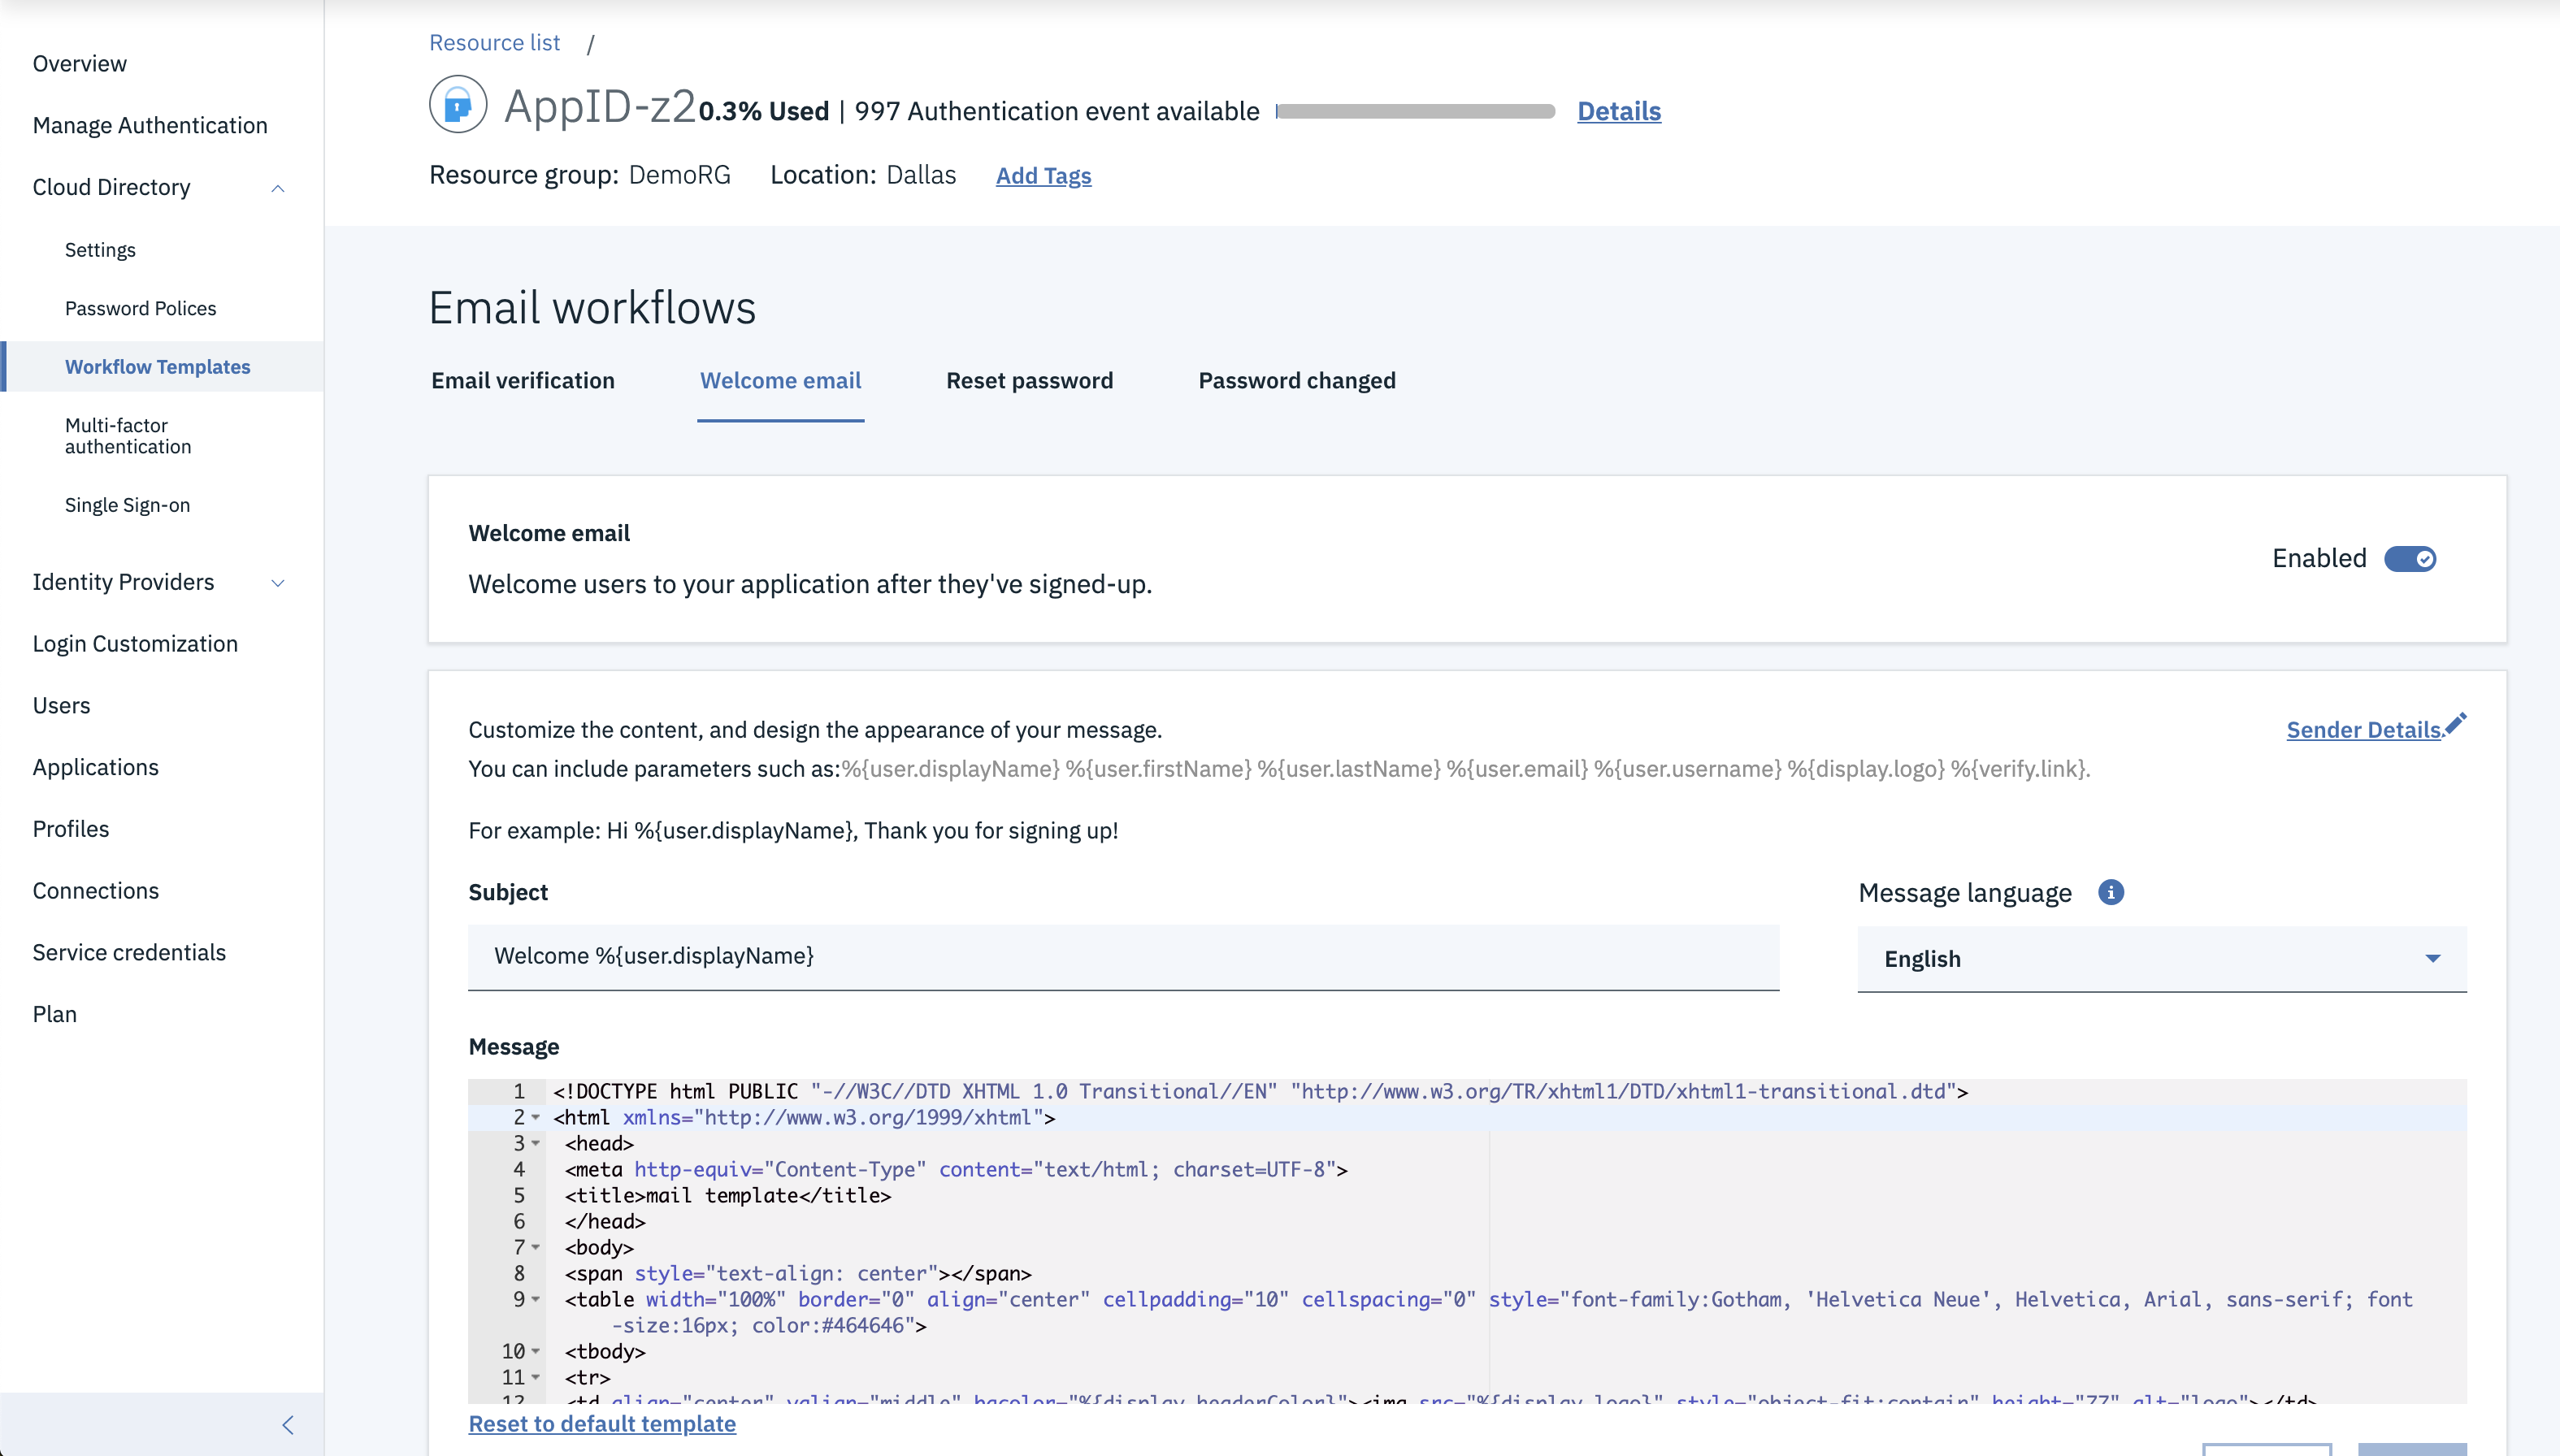
- Next, Replace the Subject line with the following:
Hello %{user.displayName}, Welcome to our site!
User Management
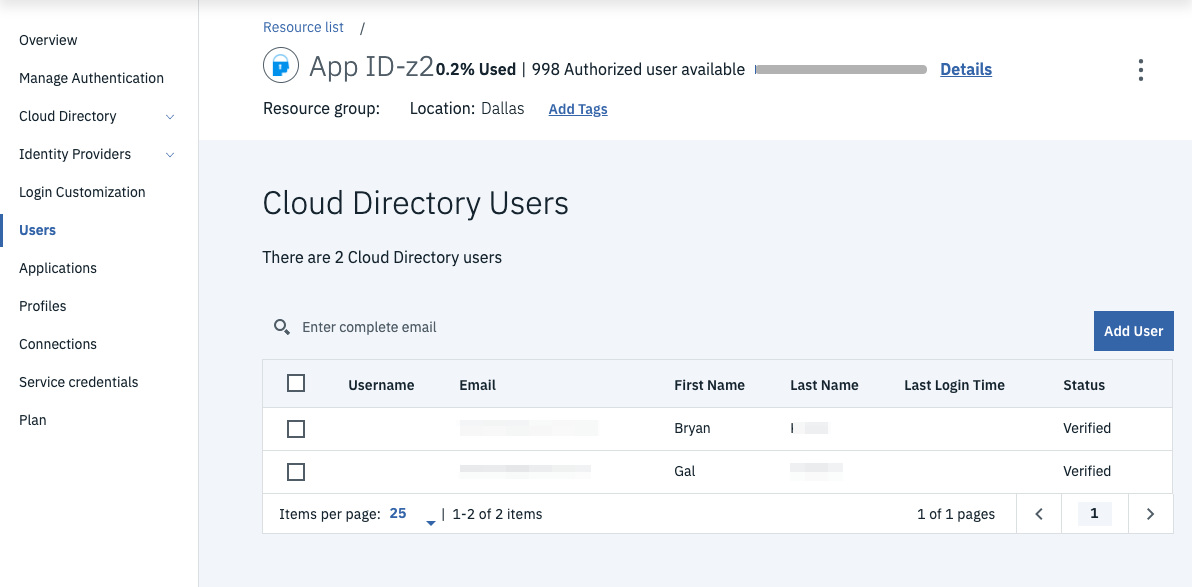
The user management section allows you to Add and Delete Users.
- To get there click on the Users tab.
Adding a User
-
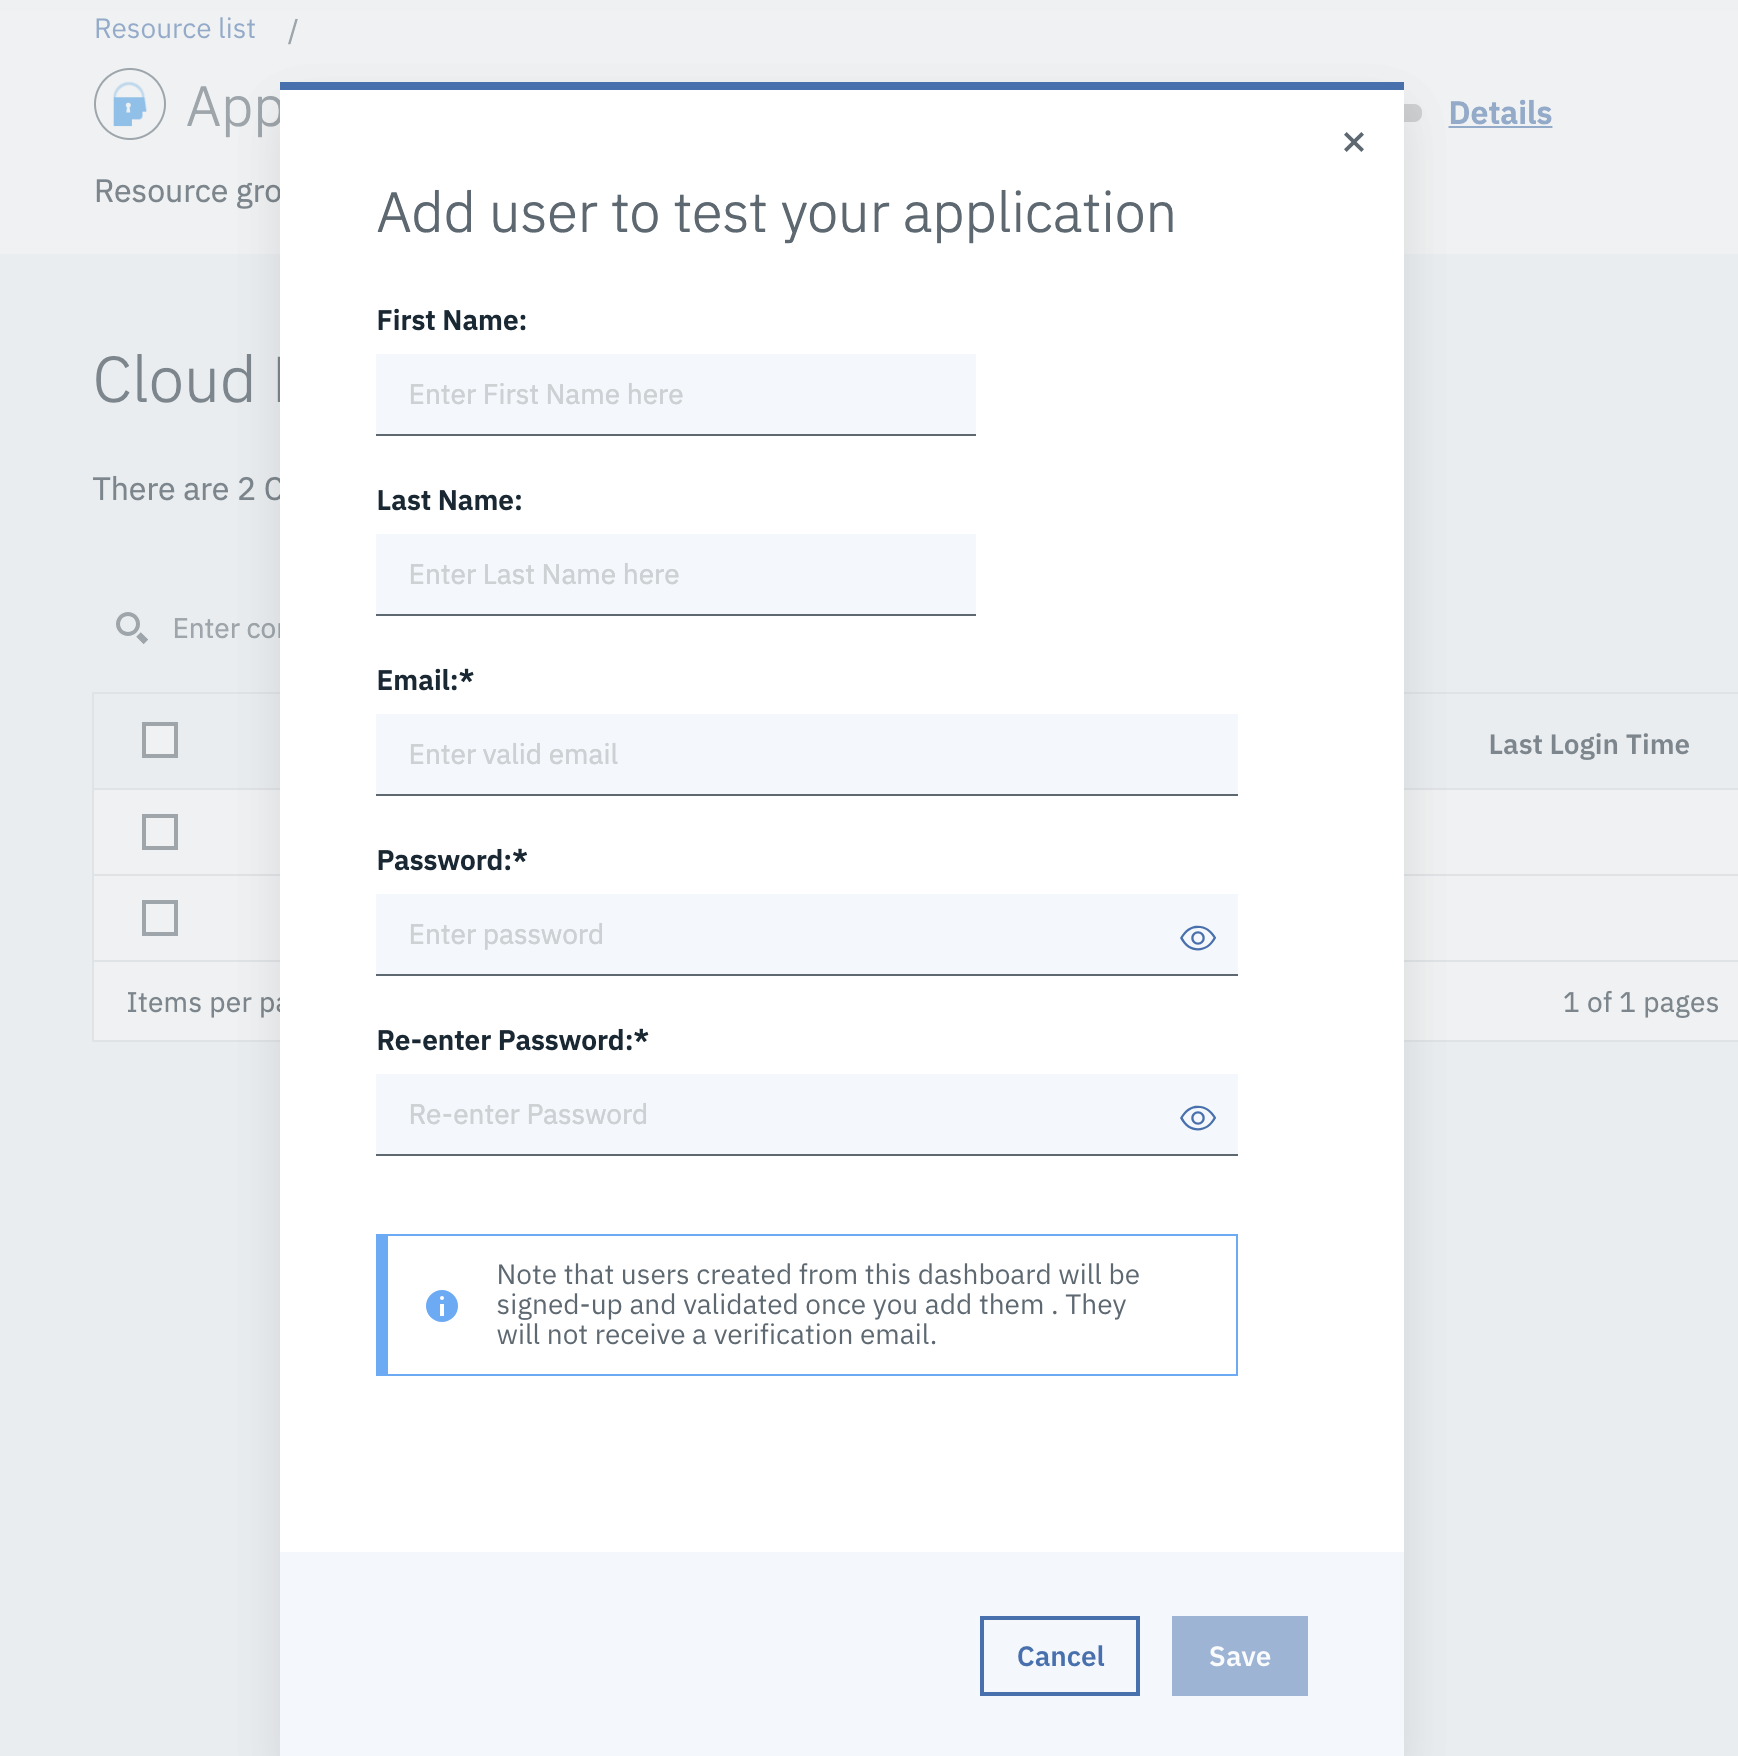
Let’s add a User. Start by clicking on Add User tab.
-
Fill out the form with example user information and click Save.
-
Now you can use that user information to sign in to your application.
-
Go to the application by Replacing the X with your team number. (Ex. https://app.team001rg-cluster.eu-de.containers.appdomain.cloud)
https://app.teamXXXrg-cluster.eu-de.containers.appdomain.cloud
Login Customization
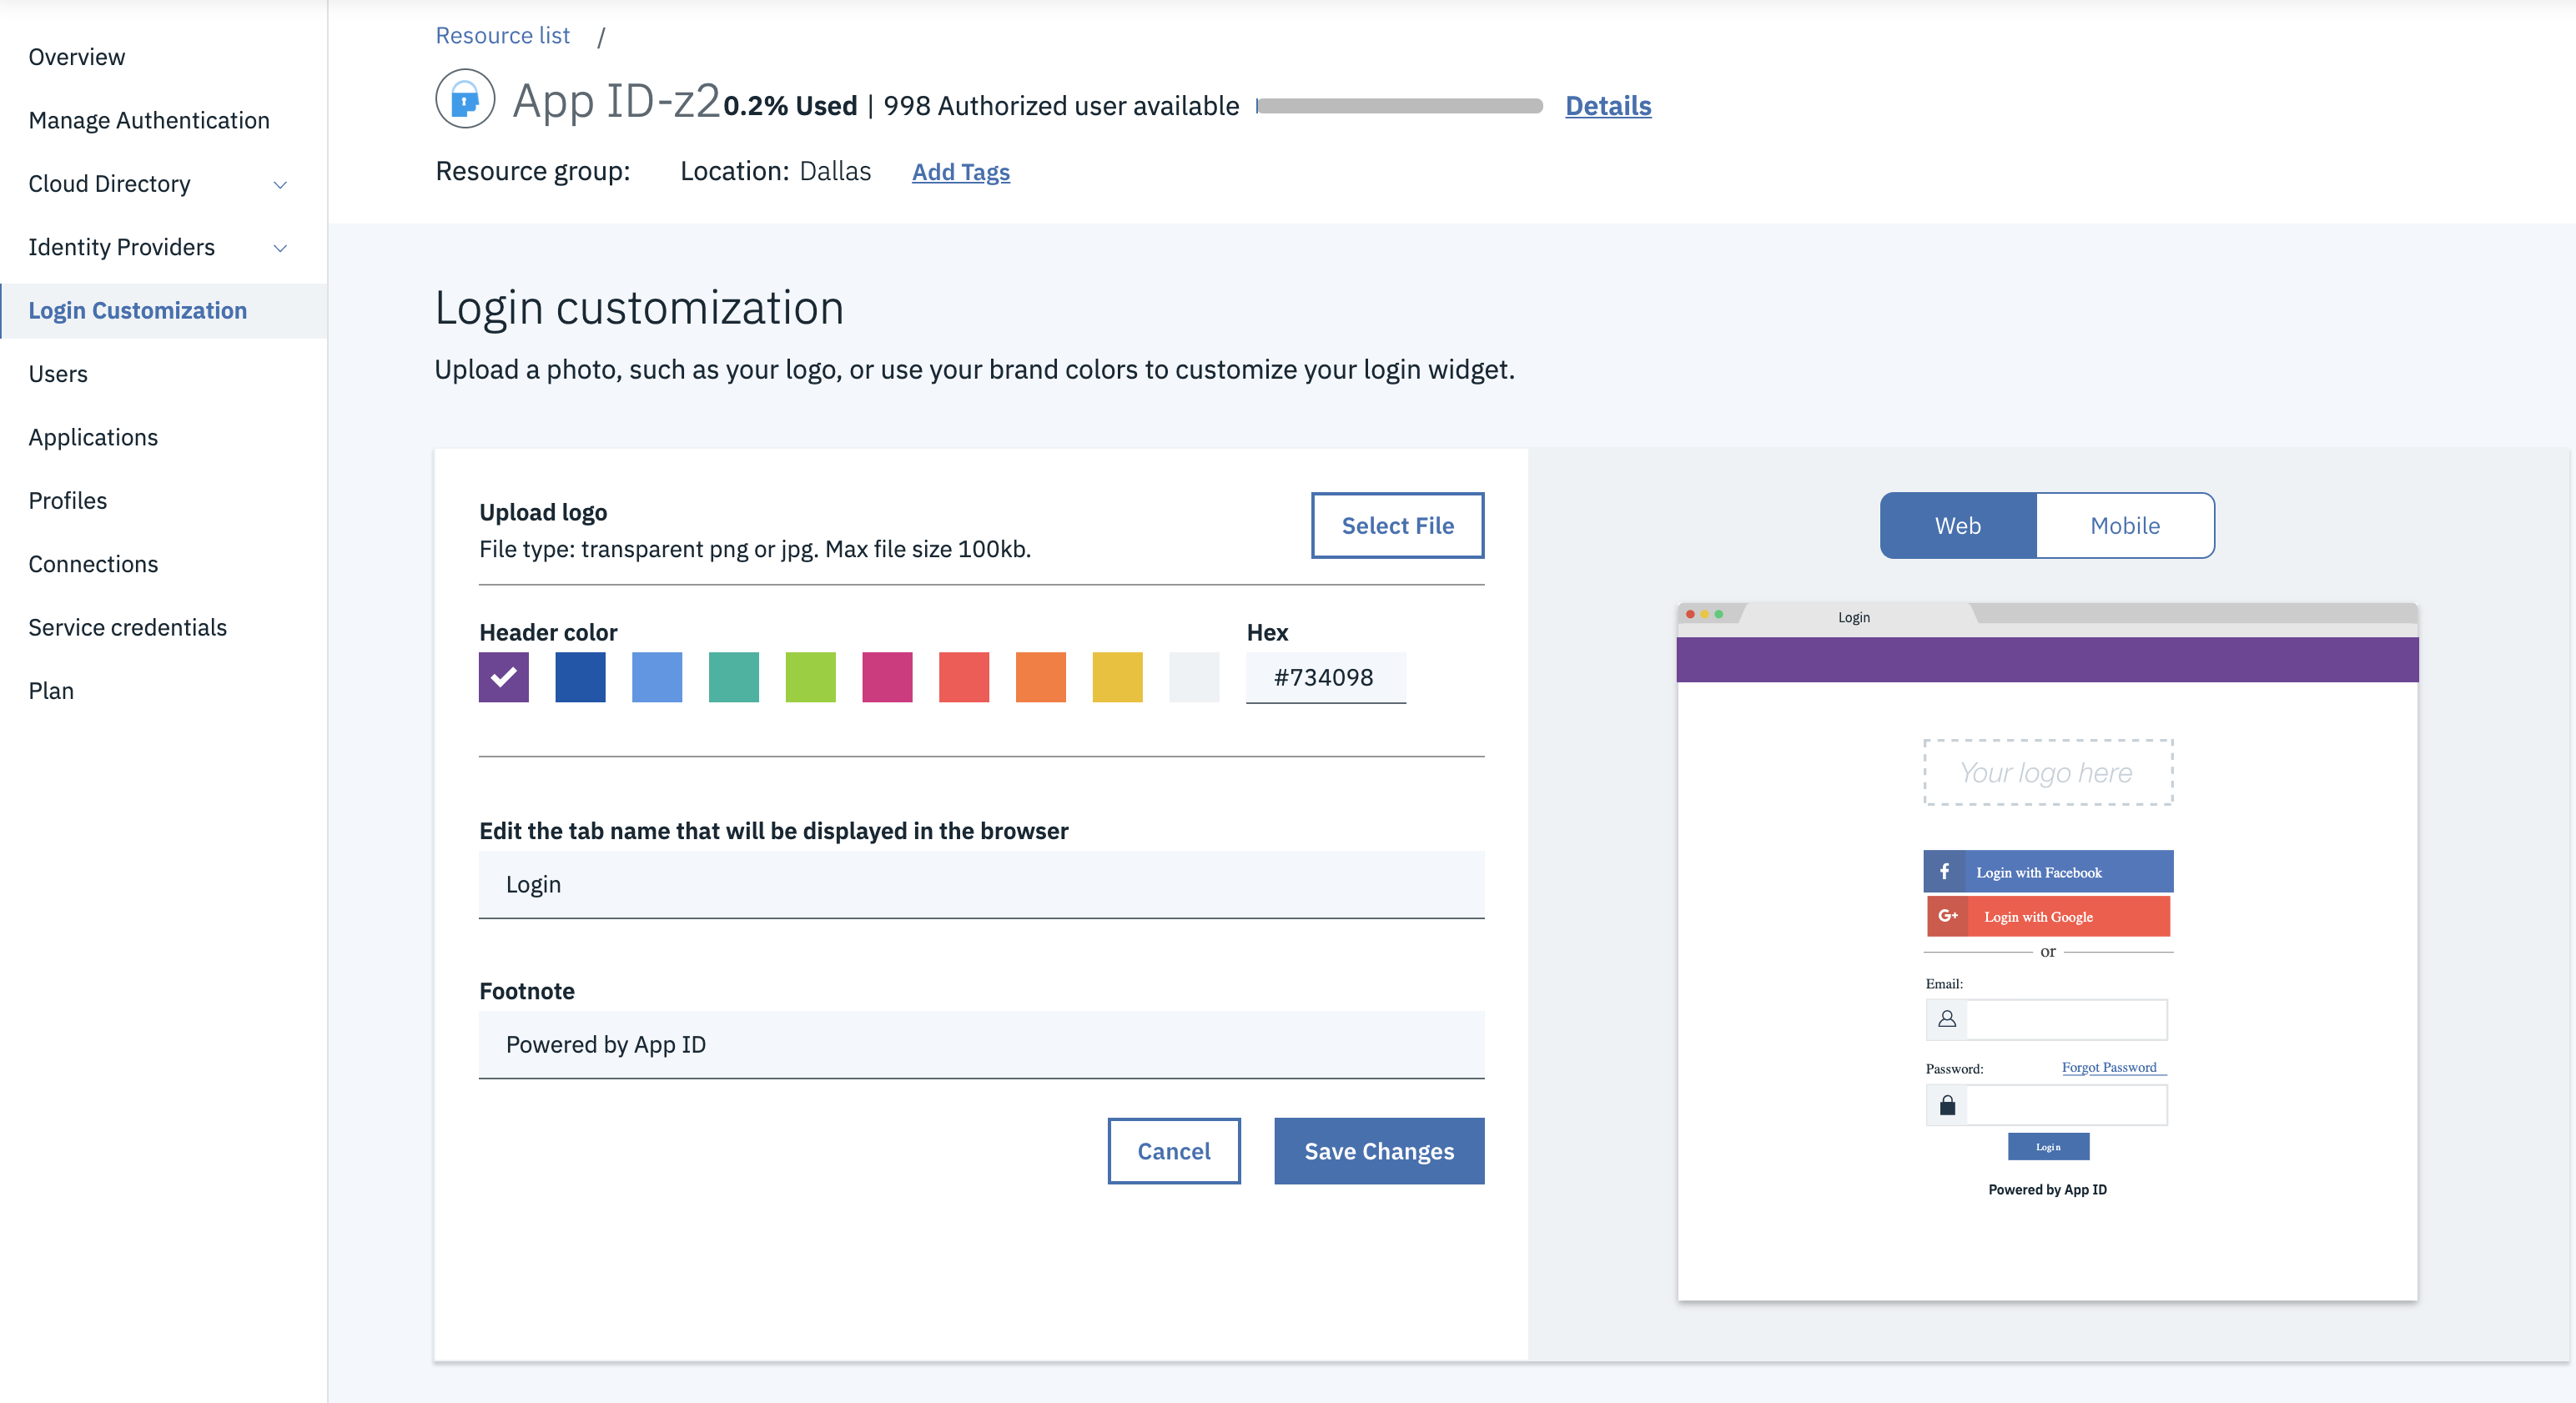
- Click on the Login Customization tab.
-
We are going to first change the logo. Download an example logo by clicking Download Logo.
-
Next click on Select File and select the downloaded logo.
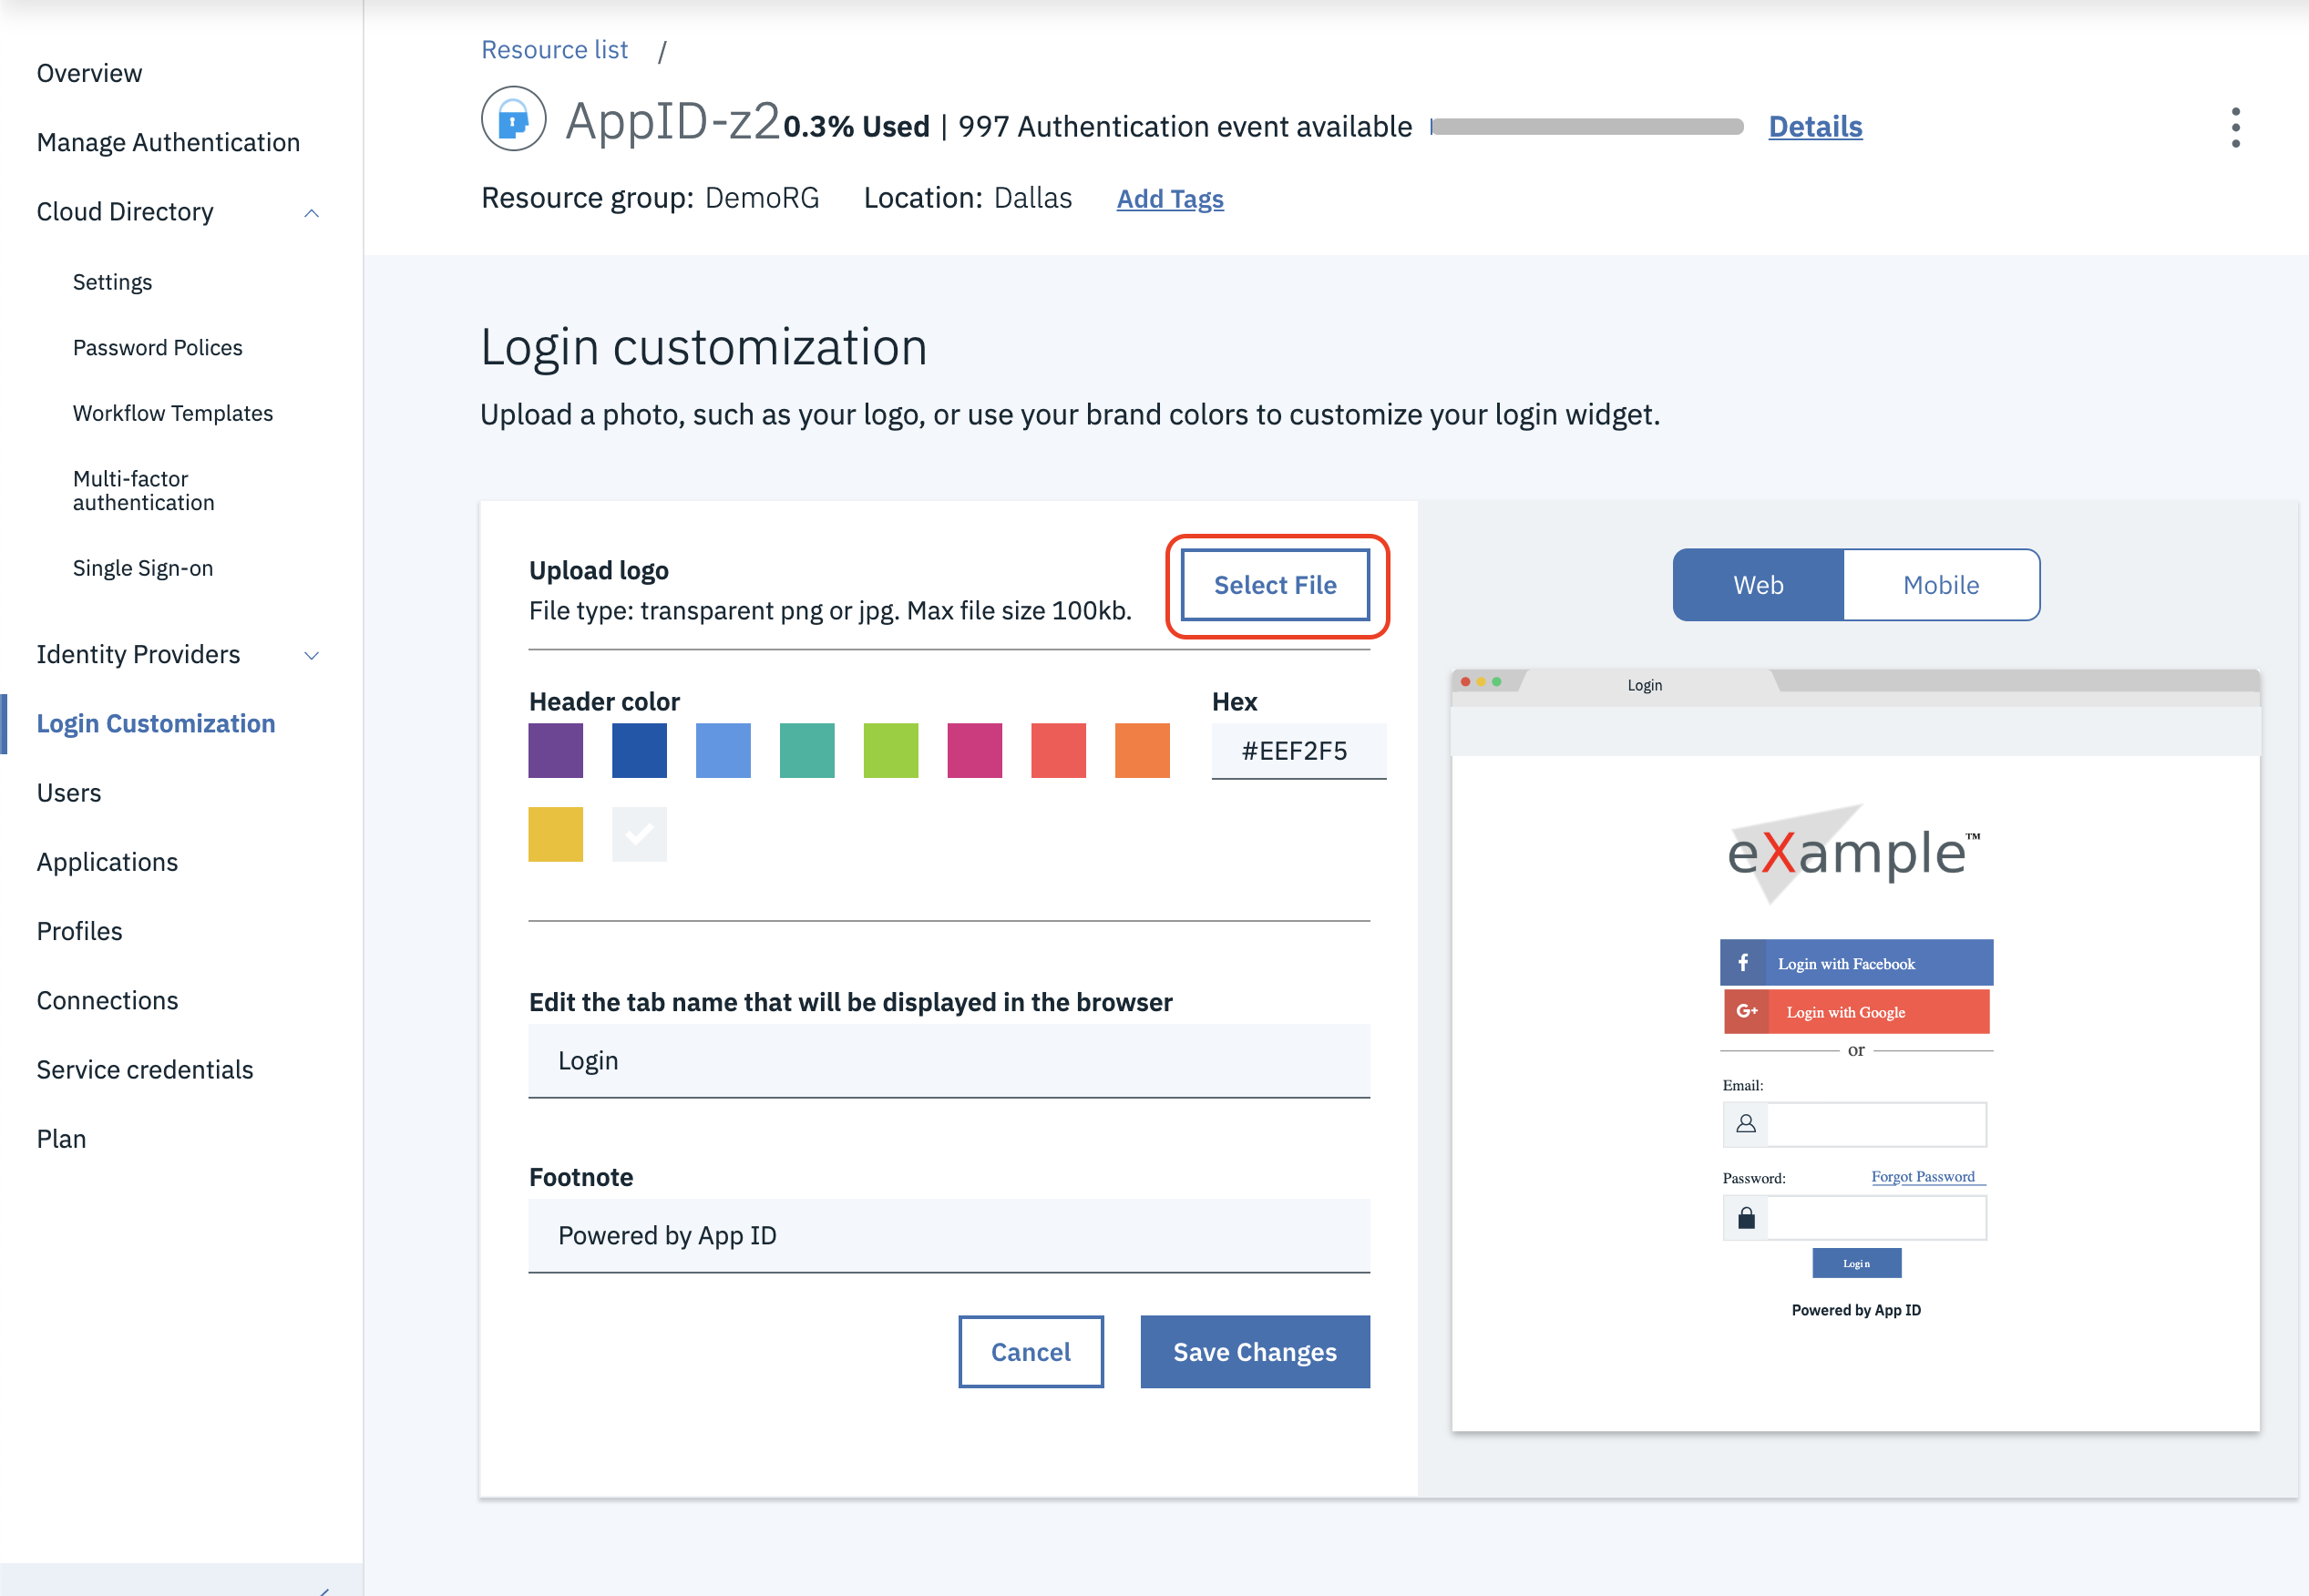
- Finally pick a Header Color of your choice and change the Tab Name and Footer to any text of your choice. Click Save Changes
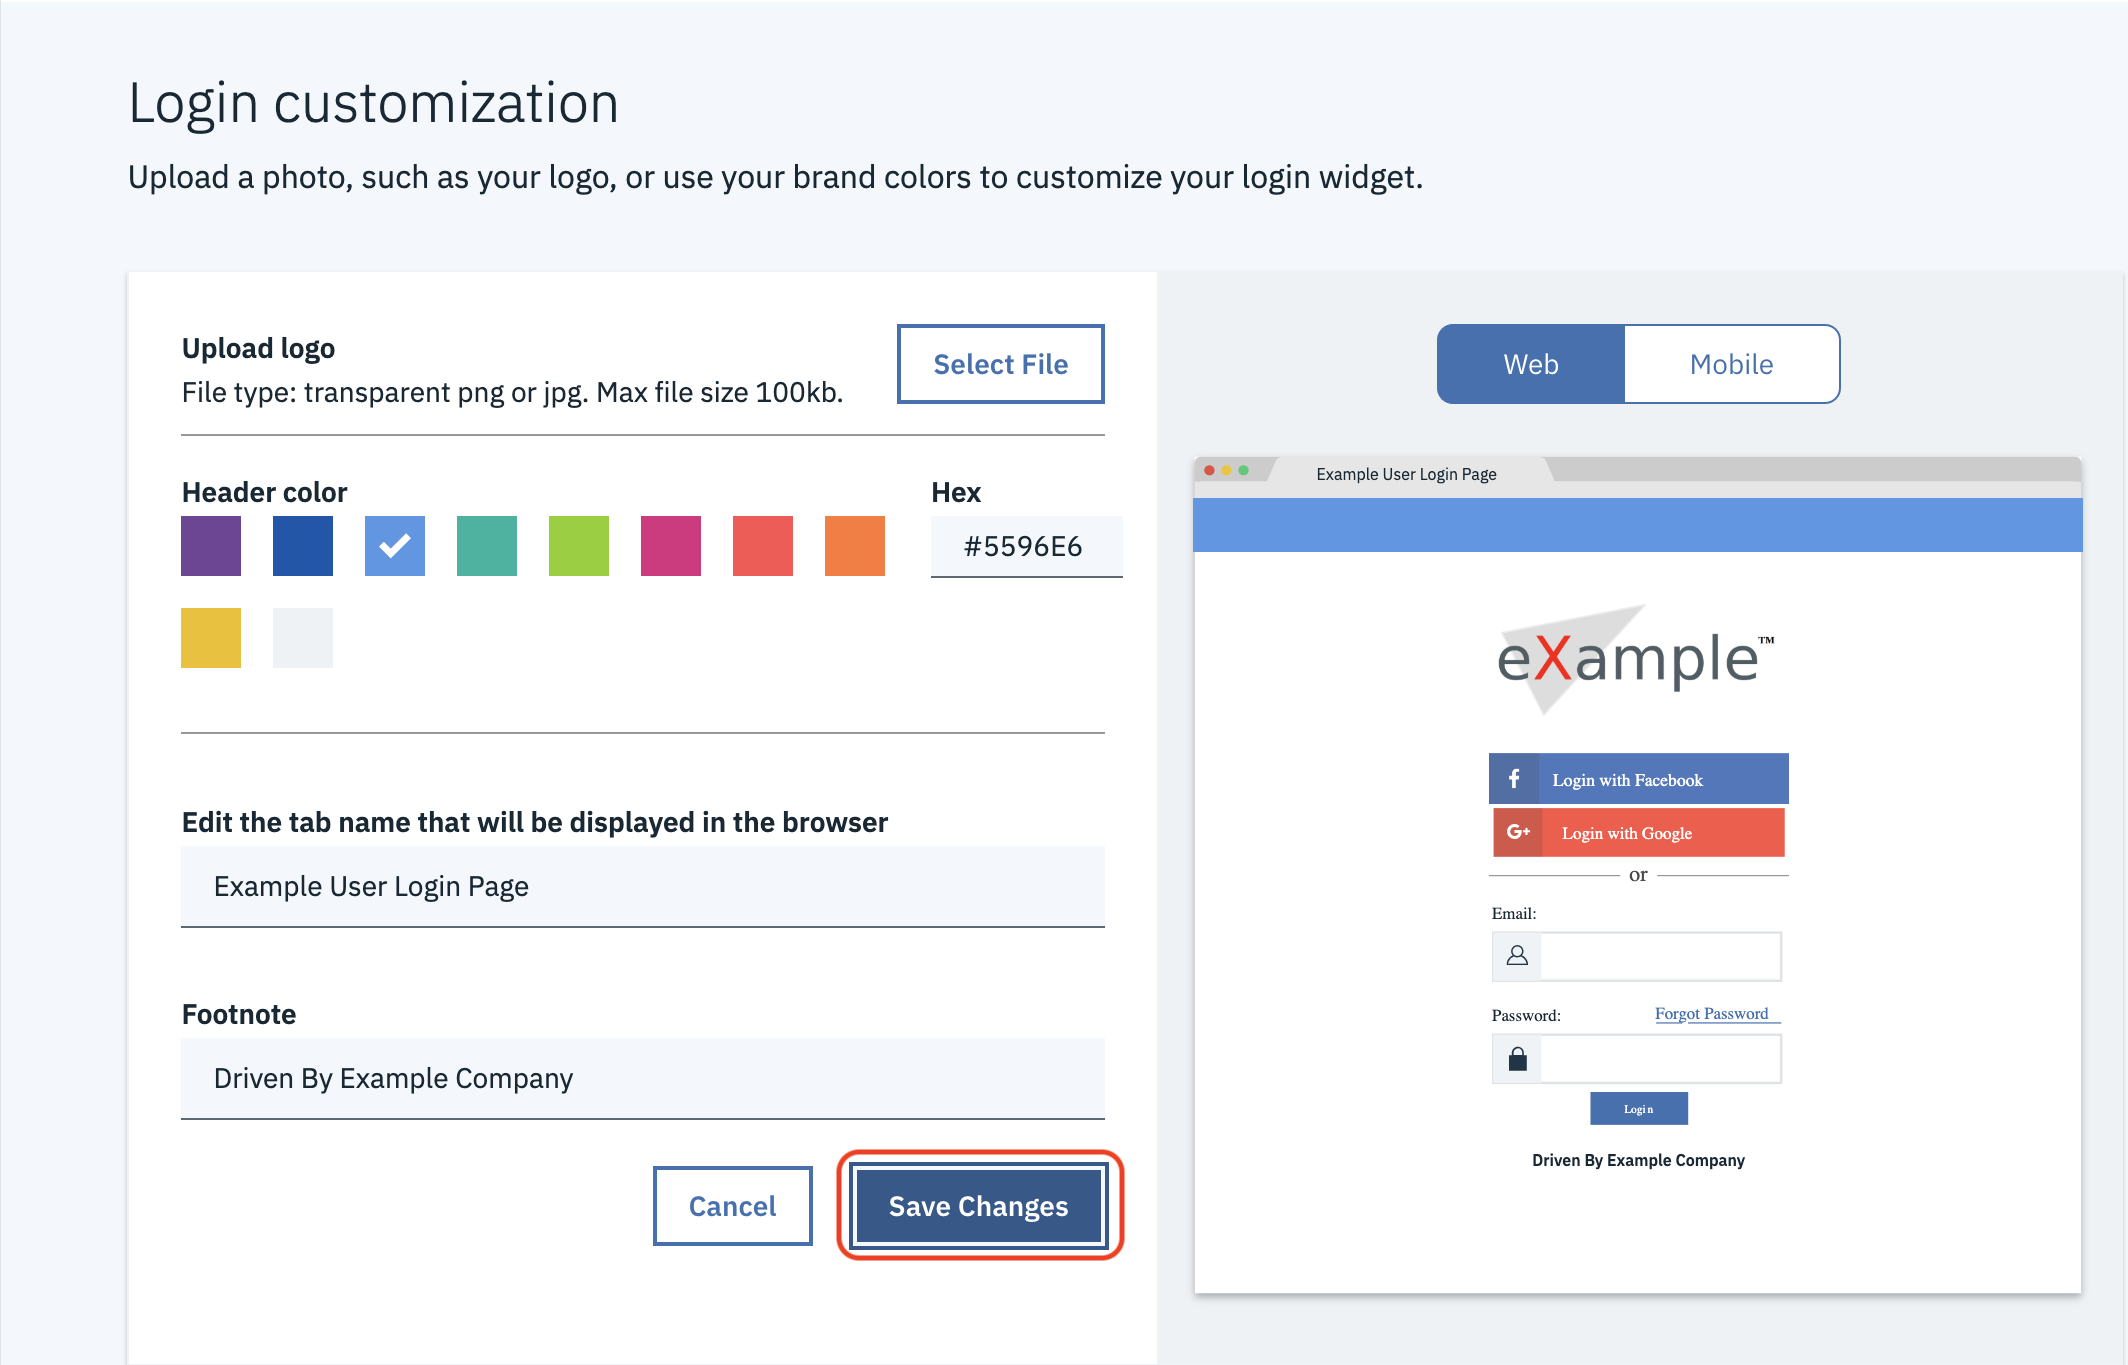
- View your work. Replace the X with your team number. (Ex. https://app.team001rg-cluster.eu-de.containers.appdomain.cloud)
https://app.teamXXXrg-cluster.eu-de.containers.appdomain.cloud